To start tracking and analyzing your website's data with Influencity, you'll need to install a tracking code. Here’s a simple guide on how to do it and manage your website connection.
How It Works
There’s a JavaScript tracking code integrated in our platform code that begins collecting data from your website as soon as you install it.
Tip:Please note that it will not retrieve any data from before the installation.
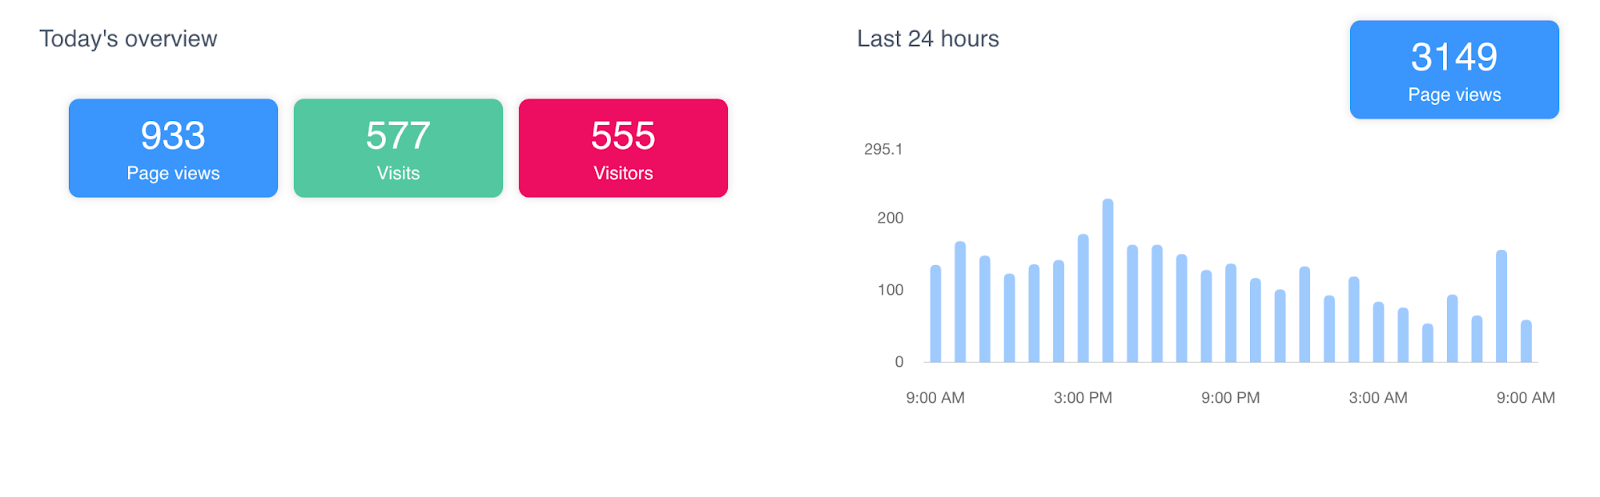
Once it’s connected, you can view real-time visits immediately after connecting your site, with full analytics available within 24 hours.
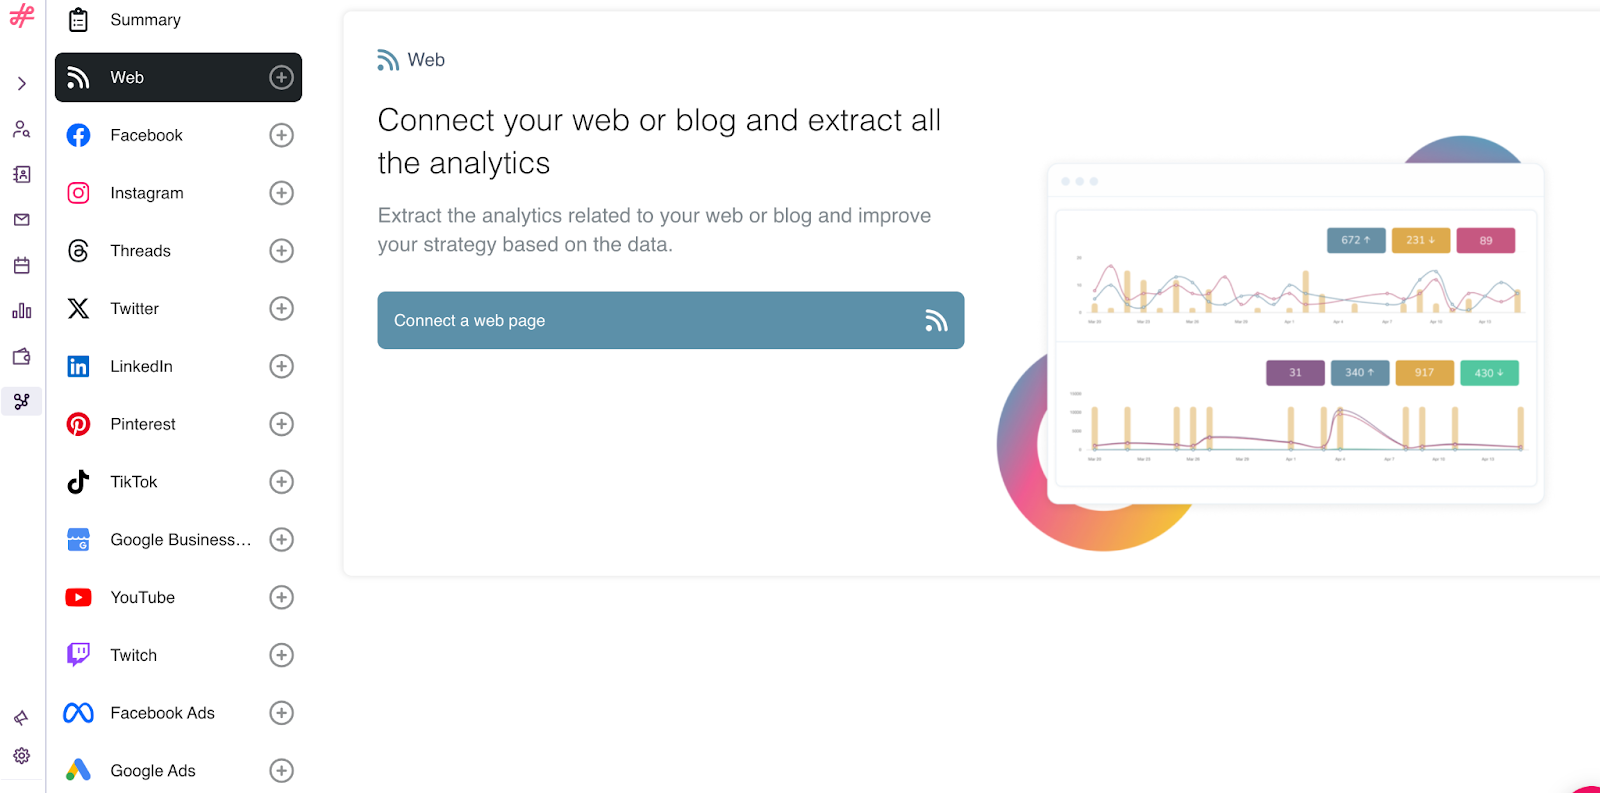
Website Connection
You can find the tracking code for each brand in the Connections dashboard. First of all, you need to decide what type of website you want to connect to. Select one of the options below.

Once you’ve made your choice, the tracking code will be displayed.
Note: The Wordpress option is currently unavailable.
Choose Your Installation Method
Option 1: JavaScript Code
For platforms like Blogger, Prestashop, or Wix, add the JavaScript code provided by Influencity to your site. Follow the instructions here.

Step 1: Insert Our Code
Insert this code provided in your web or blog using a text/html widget in the sidebar or footer of your theme.
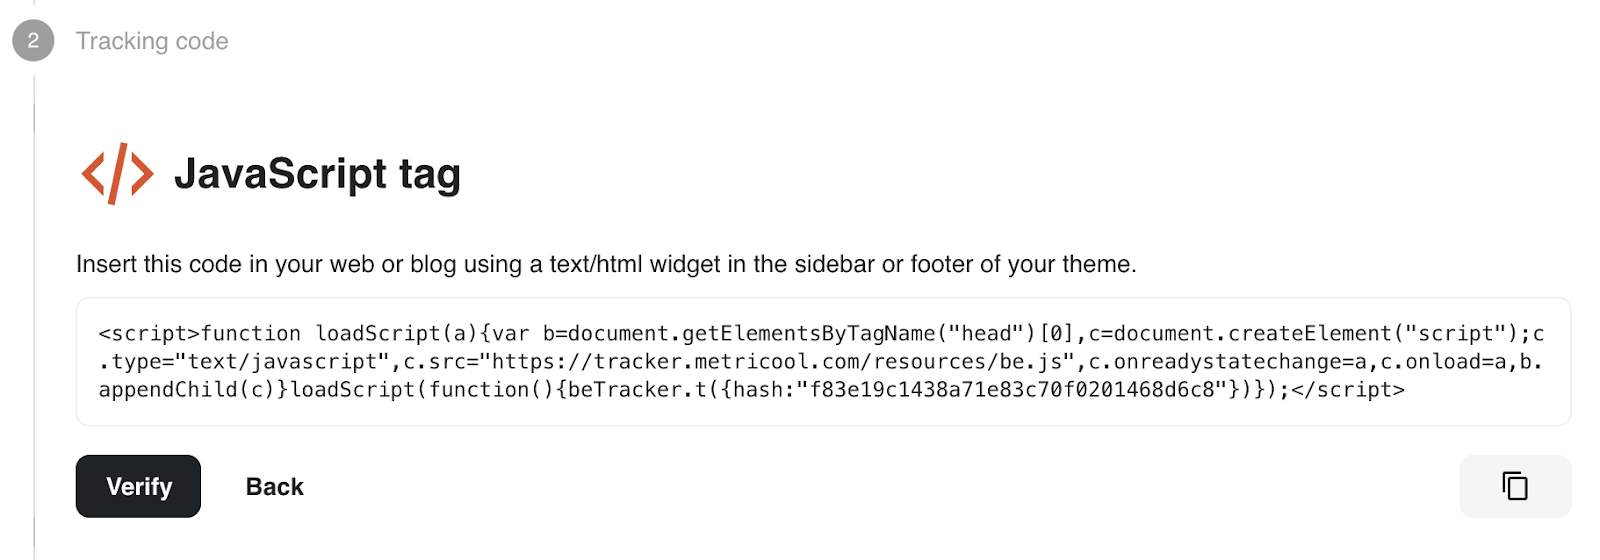
Tip: Place the JavaScript tracking code in your website’s footer, sidebar widget, or main menu—any spot that appears on all pages. This ensures all user interactions are tracked.
Step 2: Verify the Connection
If you’re verifying your website with the plugin, make sure to visit your site as a non-authenticated user or in an incognito window. This helps avoid tracking internal visits.

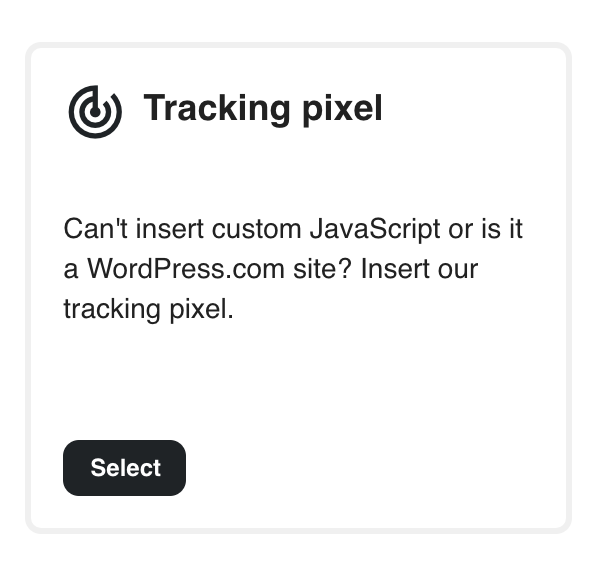
Option 2: Tracking Pixel (No JavaScript)
For WordPress.com users, use the tracking pixel option.
Step 1: Insert the Code
Insert this code provided in your web or blog.
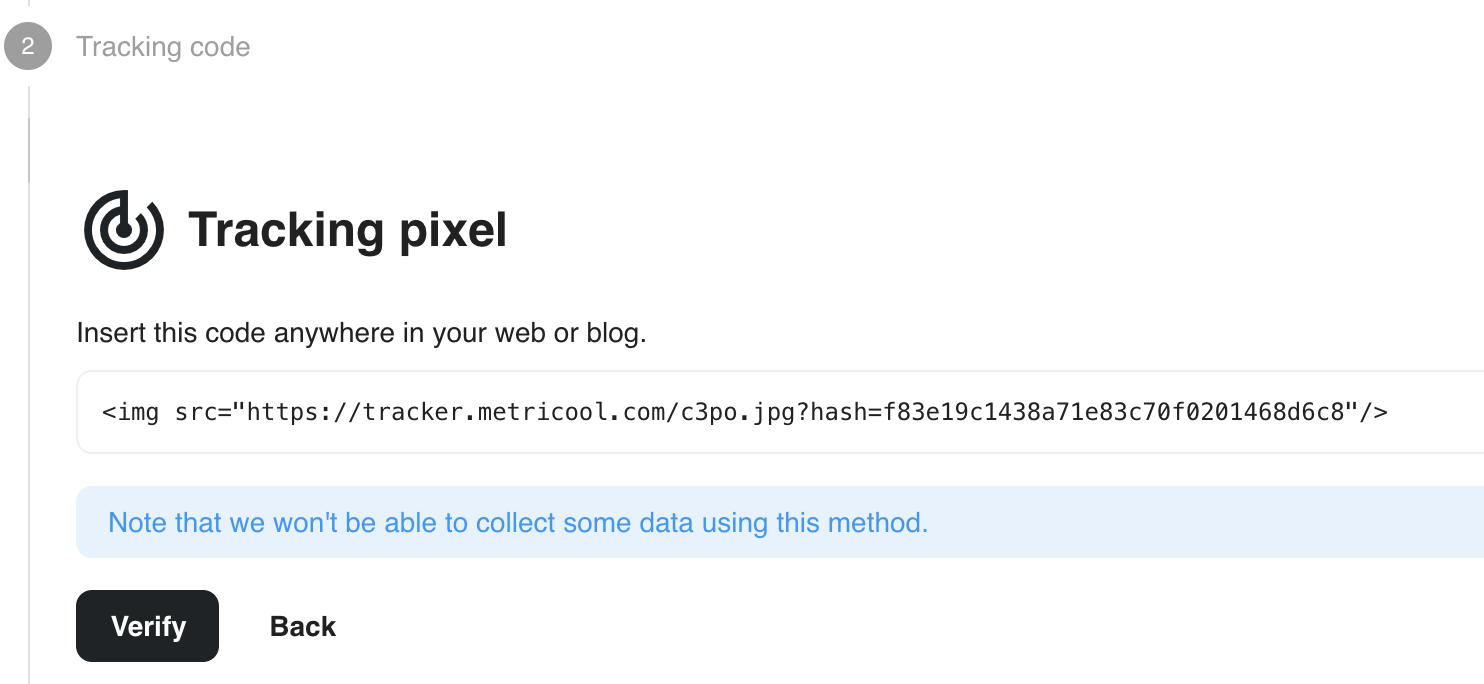
Note: This method may limit some of the data Influencity can collect.
Step 2: Verify the Connection
Once verification is complete, your website will be connected to Influencity, allowing you to view real-time visits immediately.
Analytics data will be available starting the day after the connection, with the domain updated within 24 hours.
Blog Connection
It normally has automatic detection. If your website has an RSS feed configured, Influencity will automatically detect it and display your blog post history.
Tip: If the feed isn’t detected automatically, you can manually add it through the connections panel.
Manage Visits
To exclude your own visits go to Real-Time > Exclude Visits to prevent your own traffic from being tracked.
Tip: If you have multiple IPs, you’ll need to exclude each one separately.
Disconnect a Website
To disconnect, simply remove the tracking code from your site. The disconnection may take a few days to fully process due to cached data.
Also, If you switch websites, delete the old code before installing the new one. Real-time visits will be tracked immediately, but analytics and domain updates will take 24 hours.