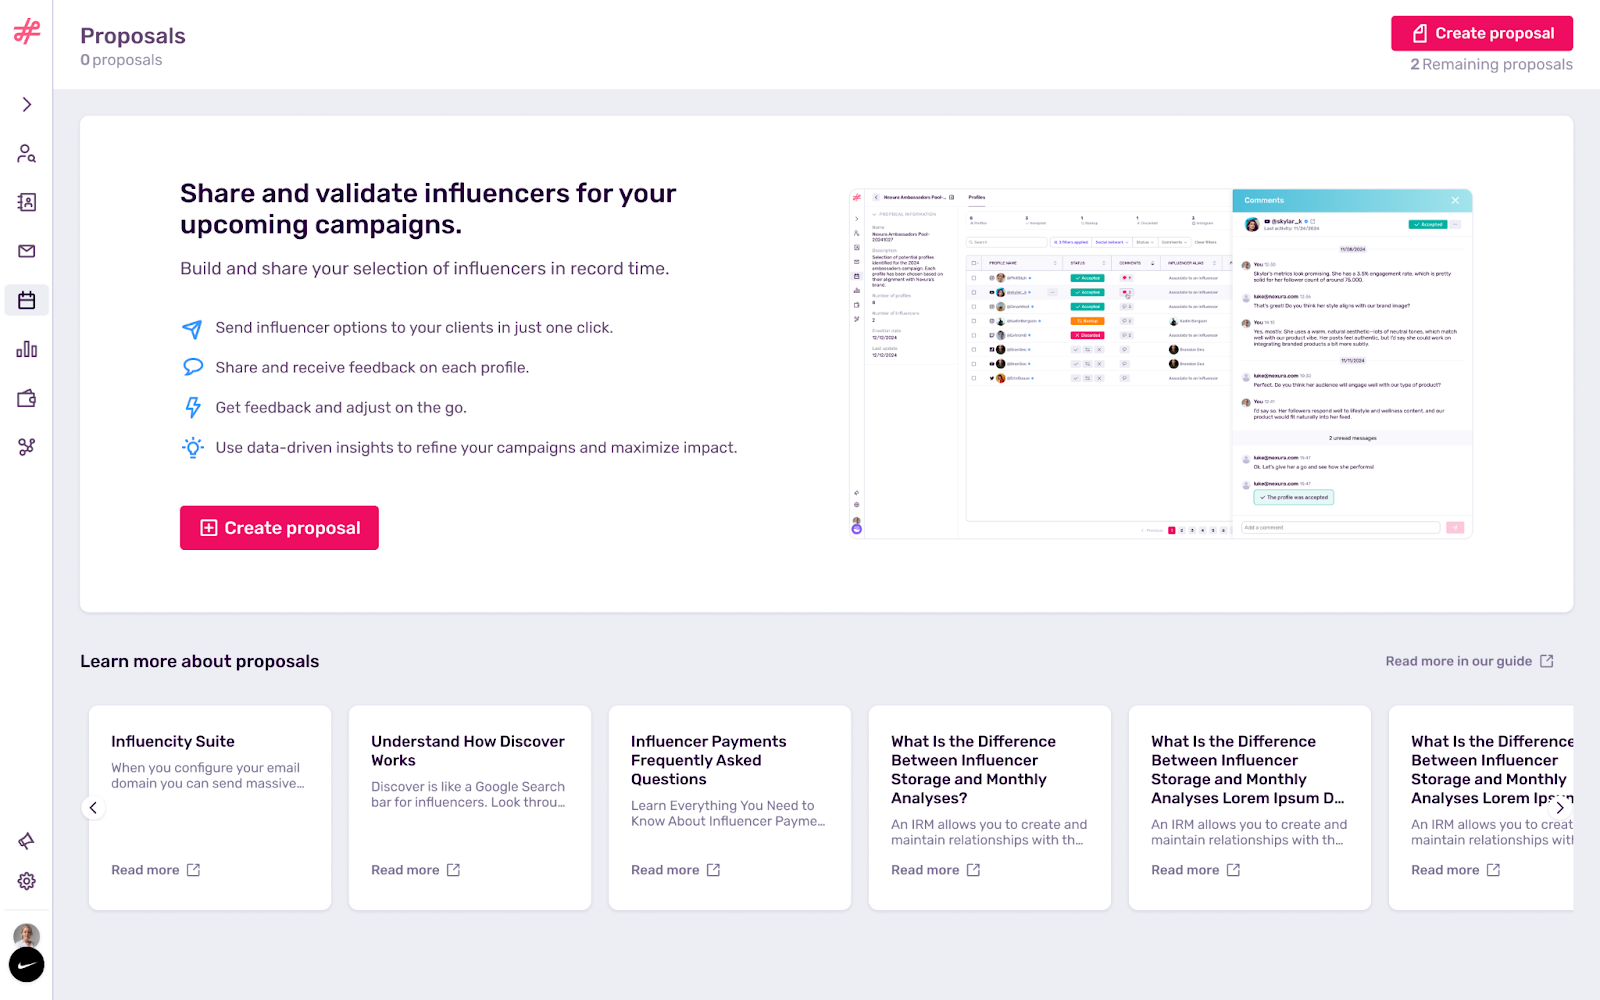
Easily review, approve, reject, and leave feedback, ensuring clear communication and faster decision-making.
Step 1: Navigate to the Proposal Section
- Go to the Campaigns section on the platform.
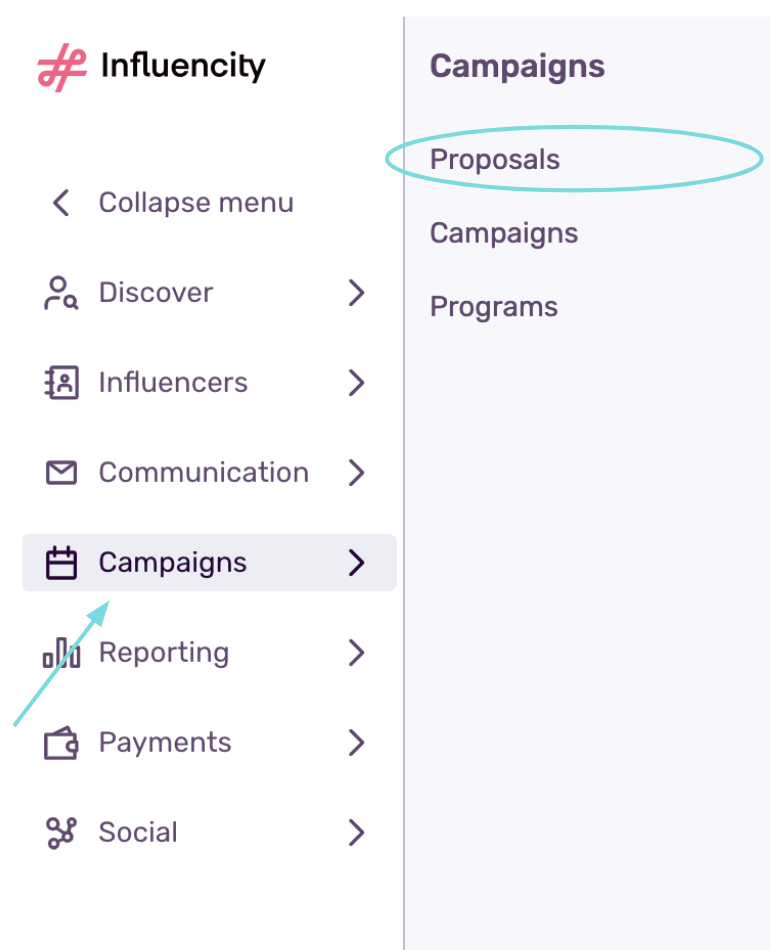
- Click on the Proposals tab and then select Create Proposal.
Step 2: Fill in Proposal Details
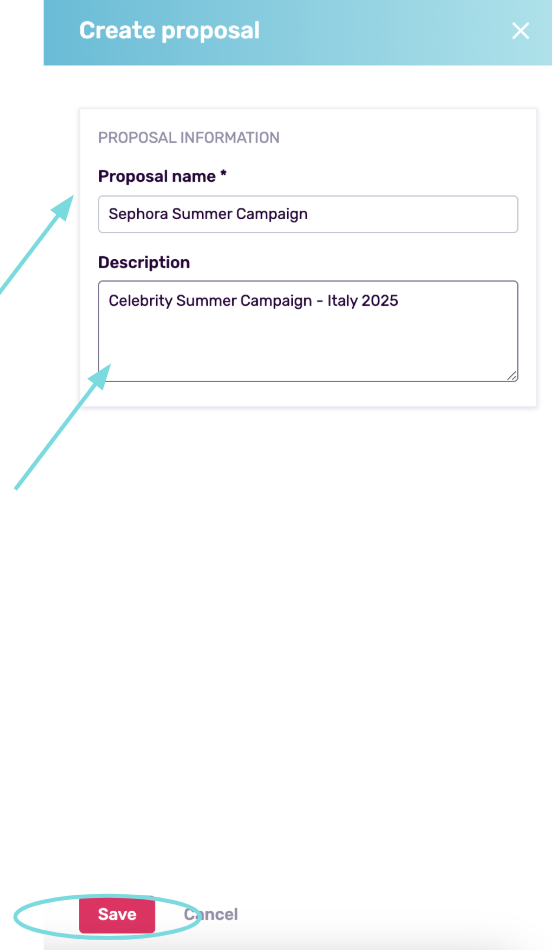
- Enter a name for your proposal that clearly identifies the campaign.
- Optionally, provide a brief description or notes for reference.
- Once you have your name and description, hit save to create the proposal.
- After pressing Save, your proposal is officially created.
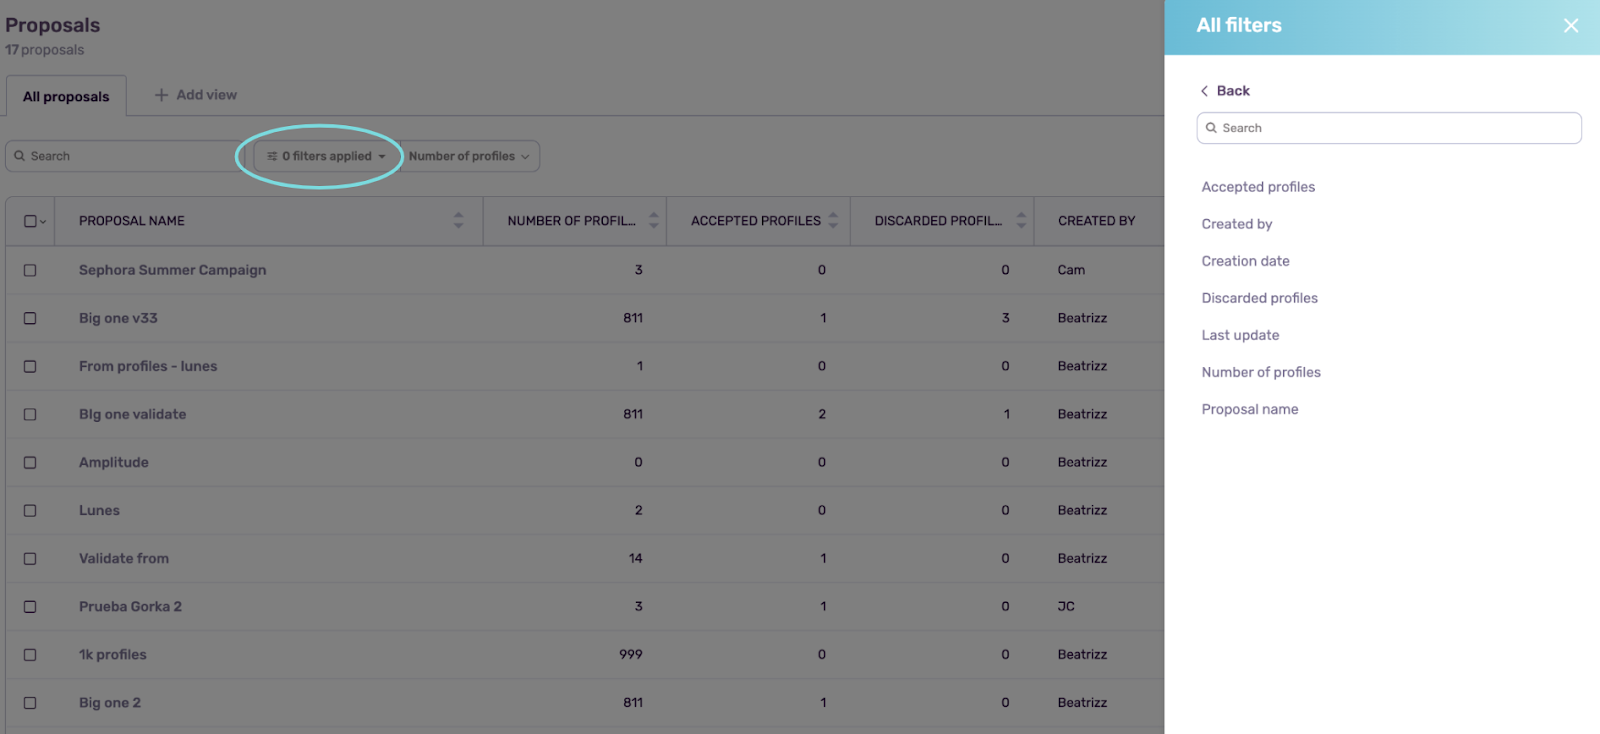
The proposals tab table view primarily displays key details, including the number of profiles in each proposal, the count of accepted, rejected, and discarded profiles, the creator of the proposal, the creation date, and the last update.
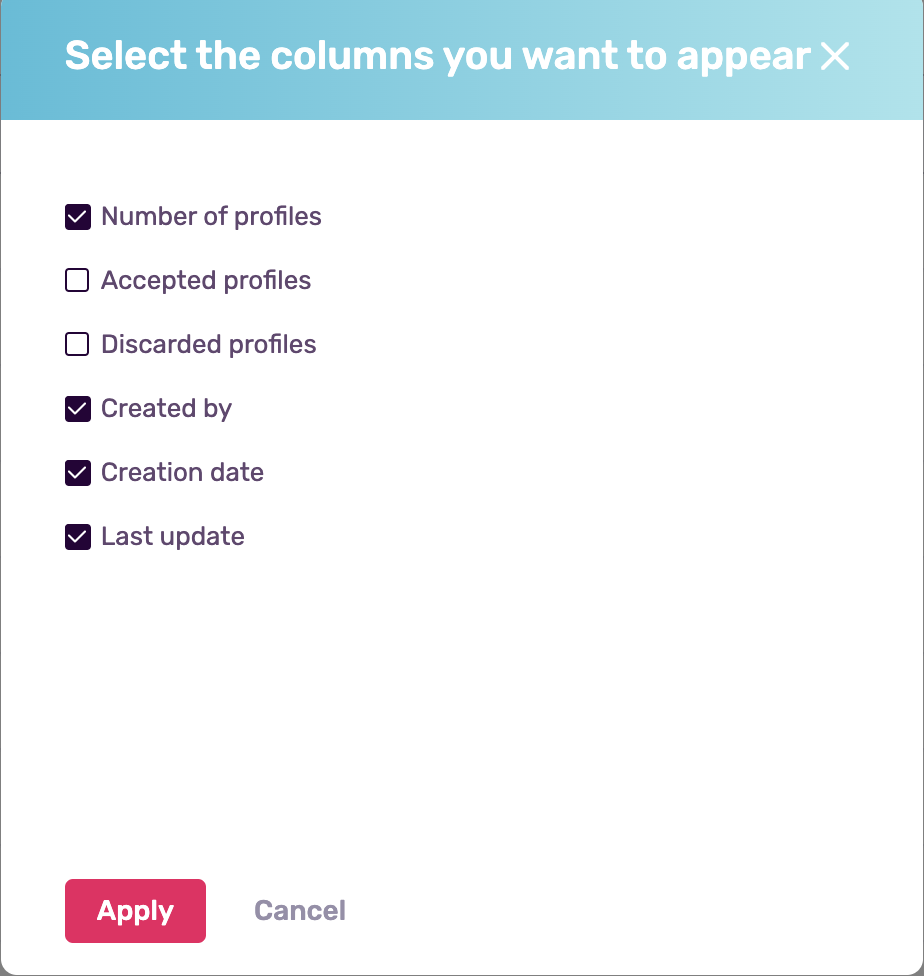
You also have the option to edit the view and choose what type of information to see on display. This can be done by clicking on Actions and hitting the Edit Columns button, and then pop up will show you which information can be shown.
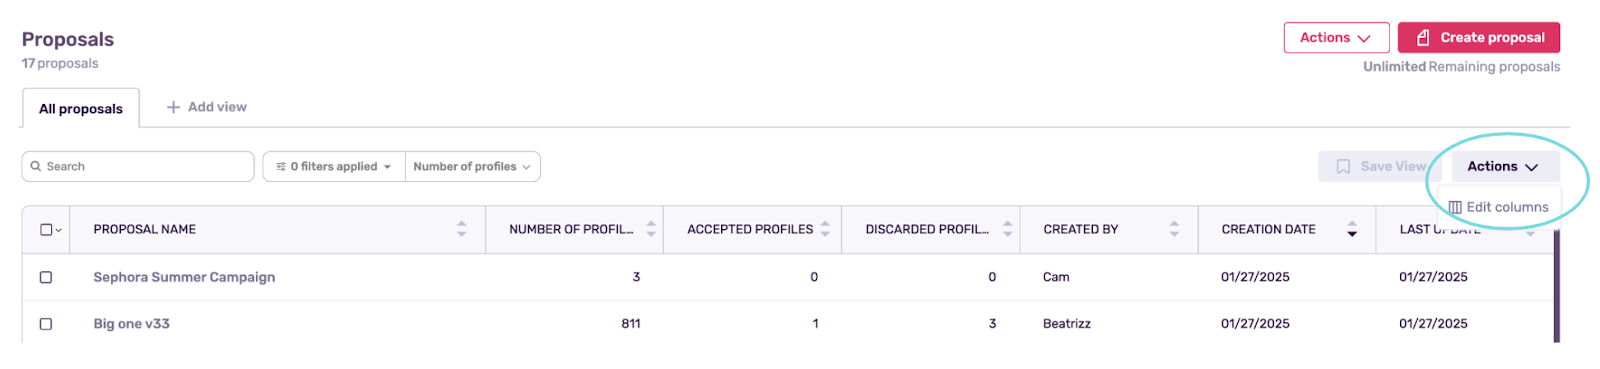
To hide any of those items, you just need to tick off the options that don’t work for you.
If you're working on multiple proposals and need to find specific data quickly, you can use filters to streamline your search. Simply click on "Filters applied," and a tab will open with various filtering options, allowing you to fine-tune your search and locate the information you need efficiently.
Step 3: Add Influencers or Profiles
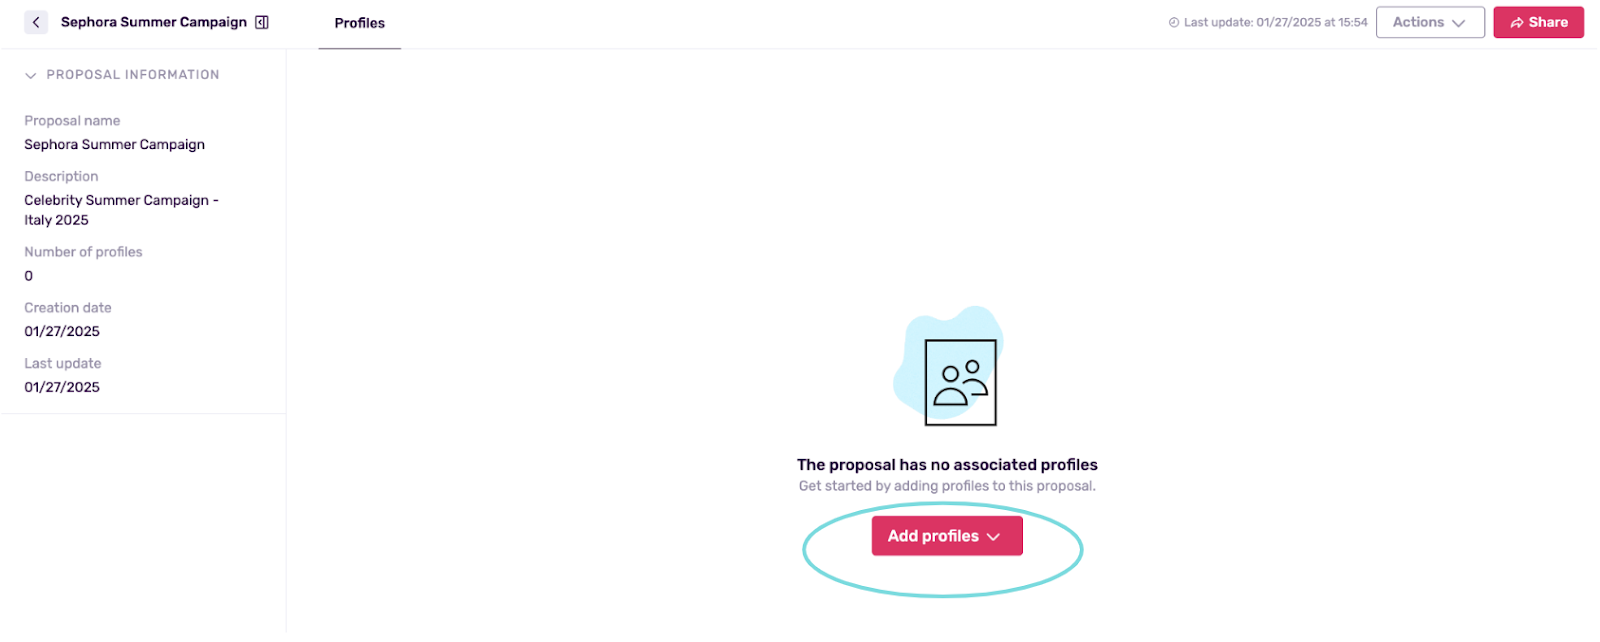
- View proposal details: Since you haven’t added profiles yet, the proposal information appears on the left side, including:
- ✅ Proposal name
- ✅ Number of profiles
- ✅ Creation date
- ✅ Last update
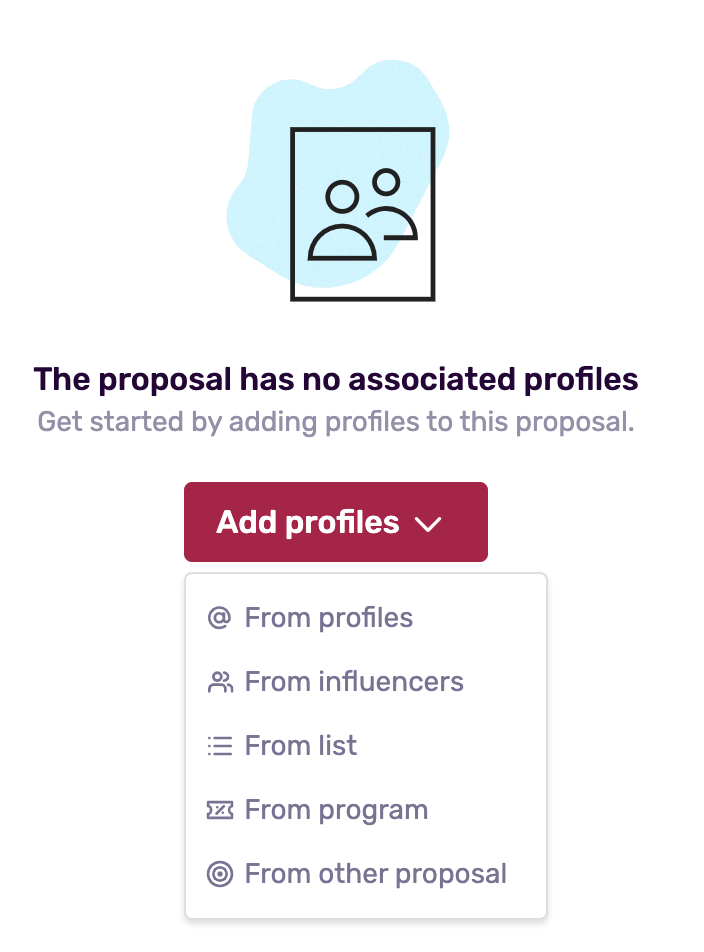
In the center, you'll see an empty state with the option to add profiles.
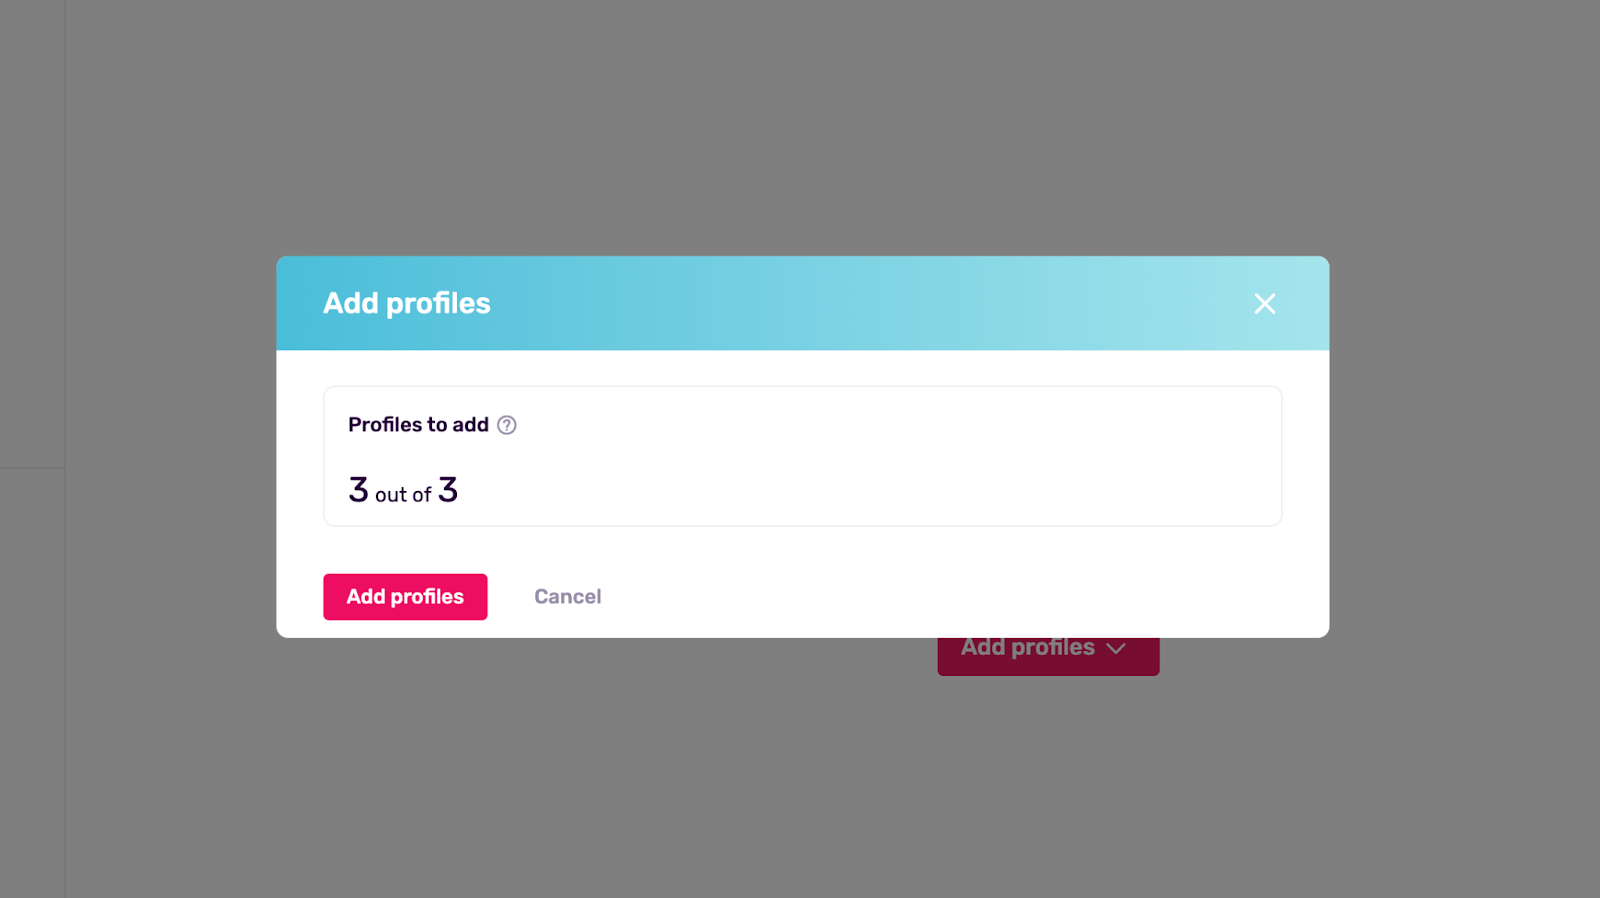
- Use the Add Profiles feature to include influencers from your database.
- You can select profiles from your profiles, influencers, lists or import them from existing influencer programs or other proposals.
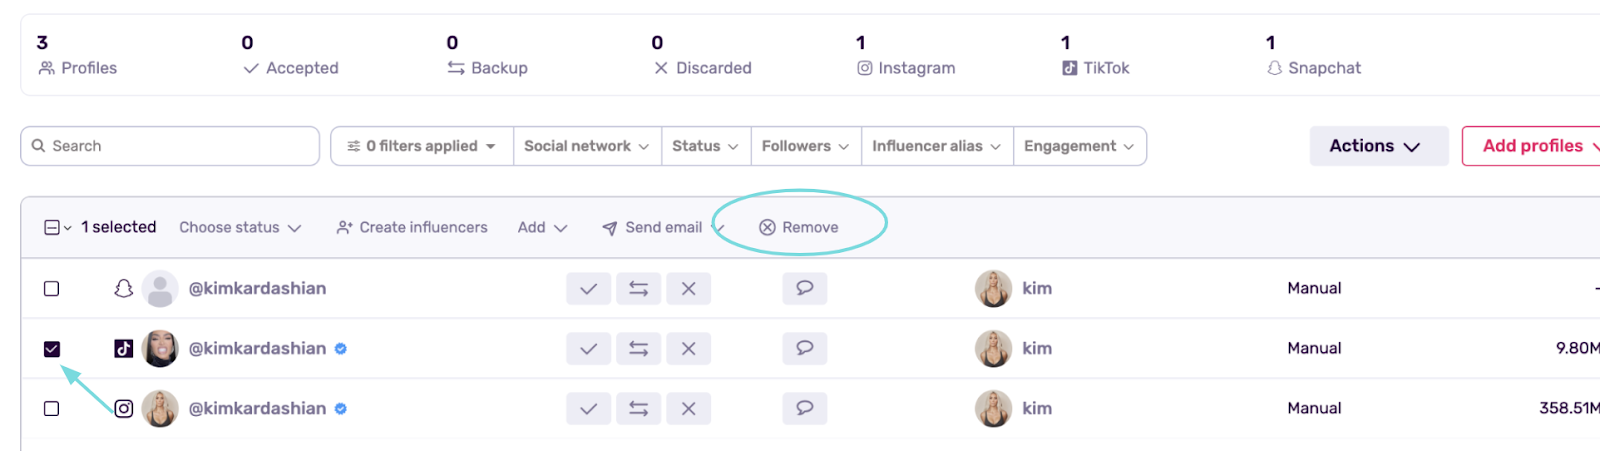
Note: If you added an influencer that has multiple social profiles, bear in mind that all the profiles will automatically be included in the proposal.
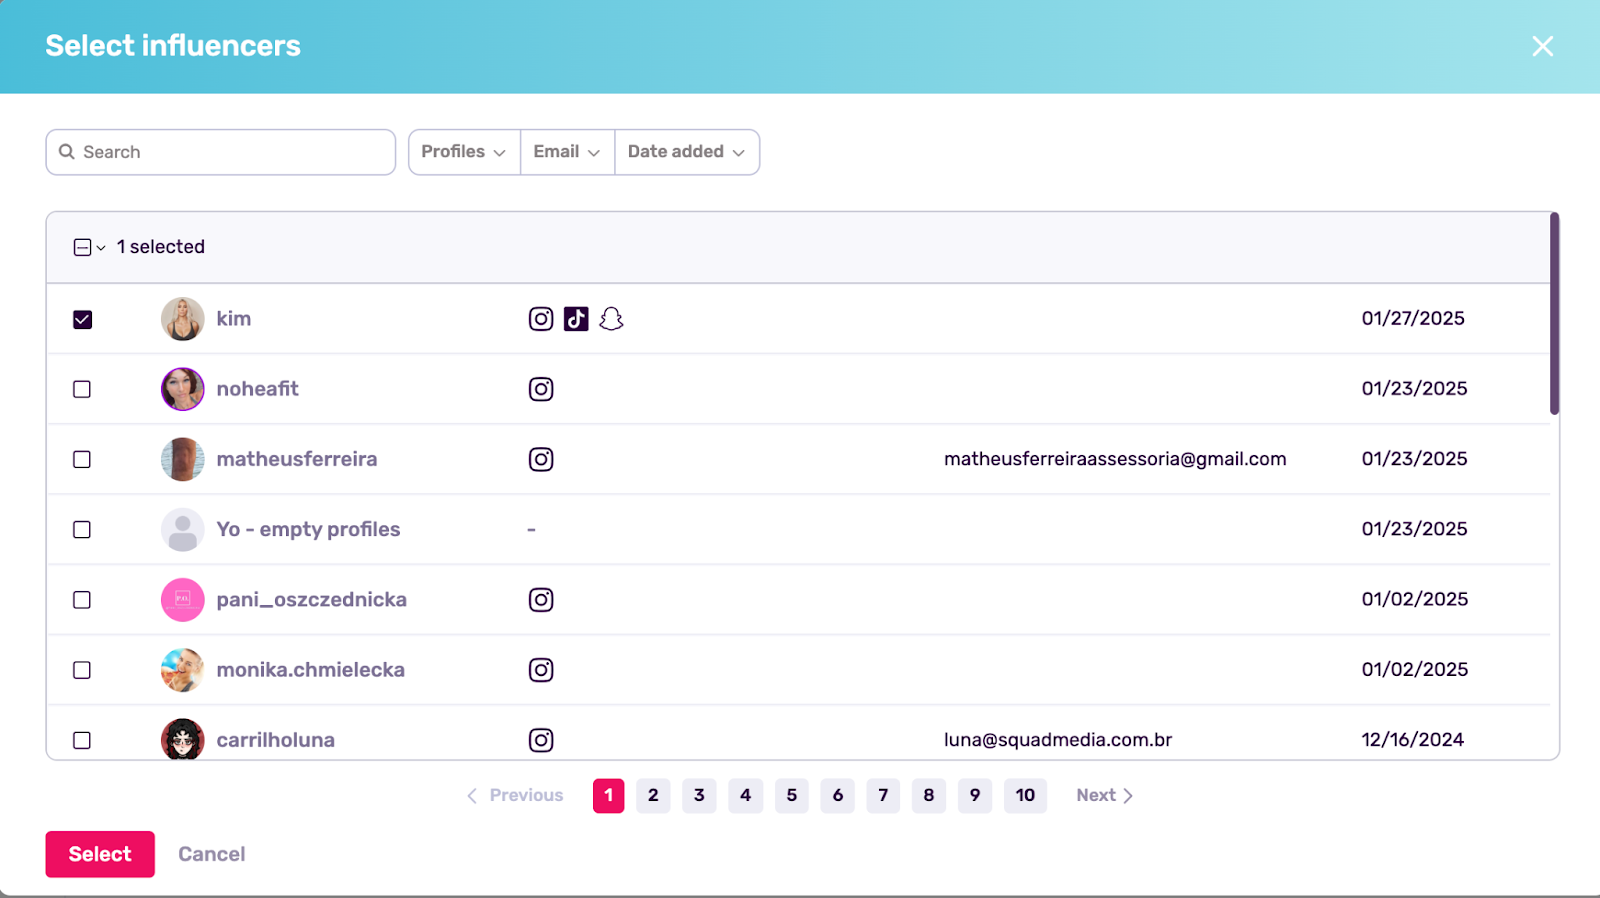
A pop up box will show you the number of profiles the influencer has, so you can decide if you want to add those profiles or not.
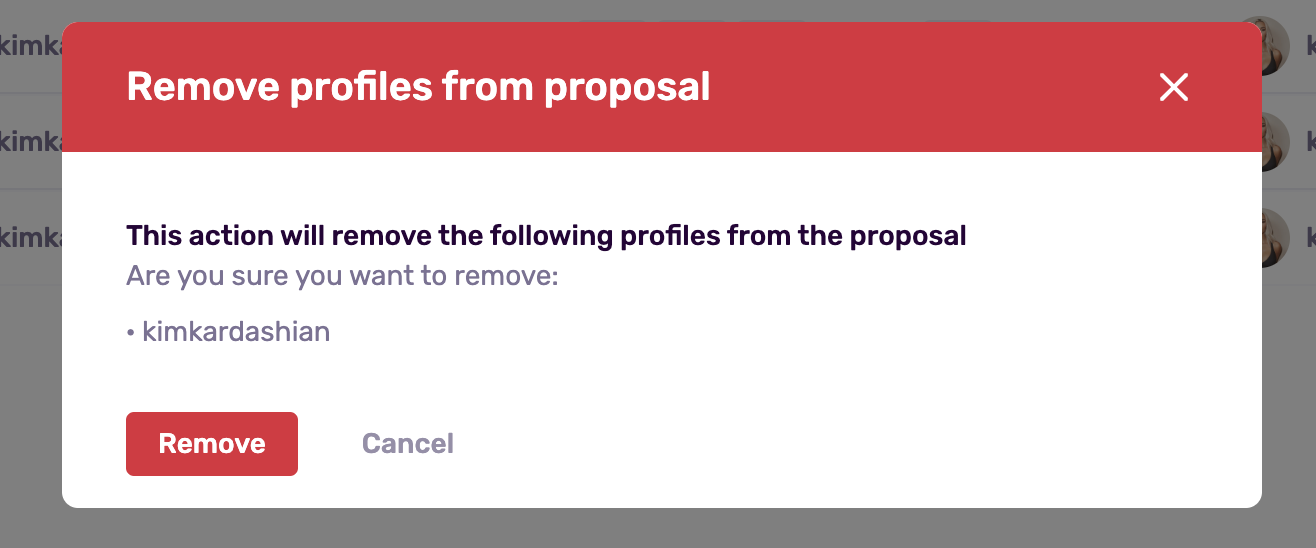
However, if you are not interested in using all the profiles of that influencer in your proposal, once the profiles appear on your list can simply choose which ones to eliminate manually by ticking those profiles off the proposal.
Another pop up box will show up and ask you to confirm your decision of removing the profile.
Step 4: Review and Finalize
- Keep on adding as many profiles as you see fit for your proposal.
- Check filters to organize the proposal efficiently.
- Once you have added all the profiles you wanted in this proposals, you can start sharing with clients.