Influencity Views allow you to save a series of filters in your database. Think of them as a shortcut that makes it easier to find a group of influencers in your database – simply set the filters you need, name your view, and navigate to this tab anytime you need to consult this group.
This article will cover how to work with Views in these 3 tabs:
Creating Views for Social Media Profiles
Head to the Influencer’s tab and select Profiles. The table on this page will already have some pre-set views:
- Instagram profiles
- TikTok profiles
- YouTube Profiles
- Twitch Profiles
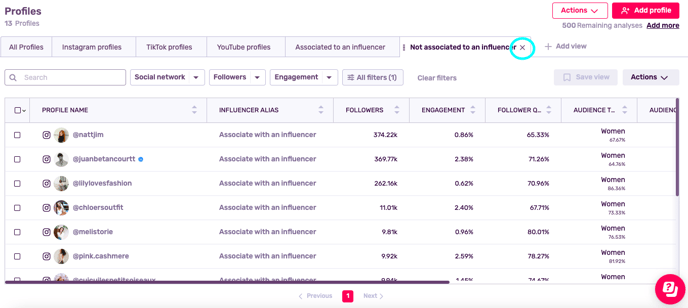
- Associated to an influencer (by associating profiles with influencers, you unlock contact details such as email addresses and phone numbers)
- Not associated to an influencer (learn how to associate them here)
Use these views to quickly find these groups of influencers. These Views can be eliminated from the table by clicking the ‘x’, but they cannot be deleted completely.
Note: While you cannot edit these pre-set views, you can add filters to them and save them as a new view.
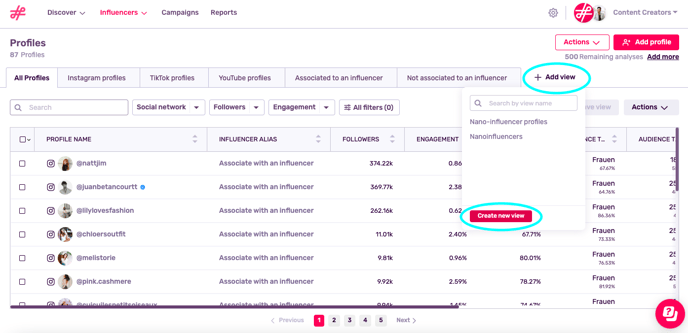
If there’s a specific group you’d like to have fast access to, create your own View following these steps:
- Go to Add view and Create new view.
- A side window will open where you will be asked to name this view. As we are working in the Profiles section, the Object of this view will automatically be set to Profiles.
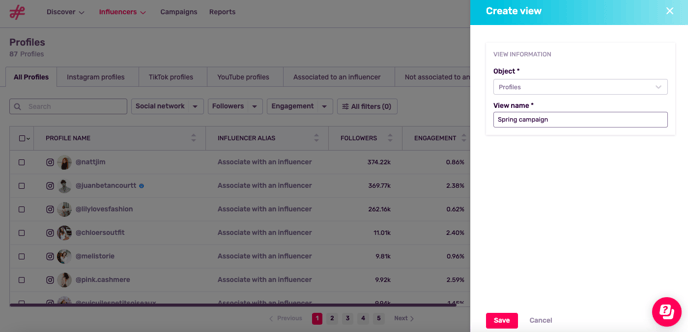
- Set filters for Social network, Followers, and Engagement. For our Spring campaign view, we only want profiles on Instagram and TikTok.

- Go to Save view and Save. As this view was created by you, it is fully editable.
- And that’s it! Your new view will now be displayed along the top of the profiles table. You can return to it and make changes at any time by clicking on this tab.
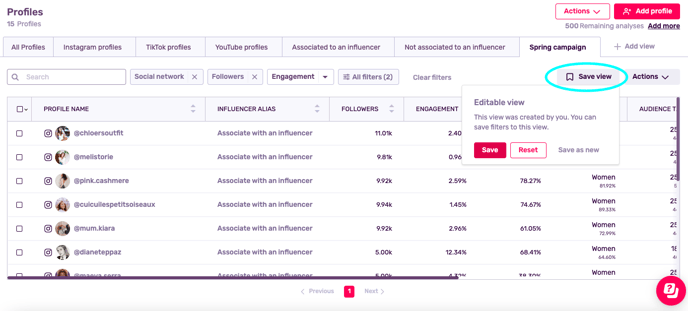
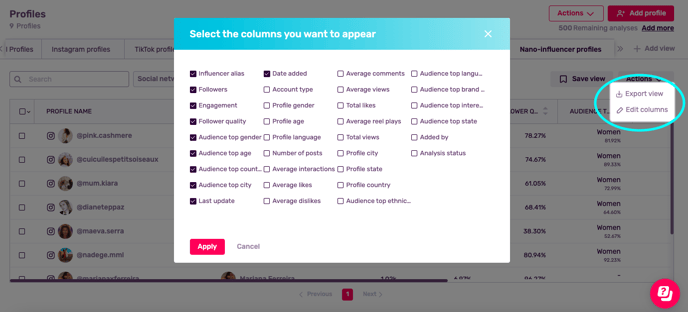
- To consult what filters are applied, click on All filters. To export this view or change the information displayed in the table, click Actions.
Creating Views for Influencers
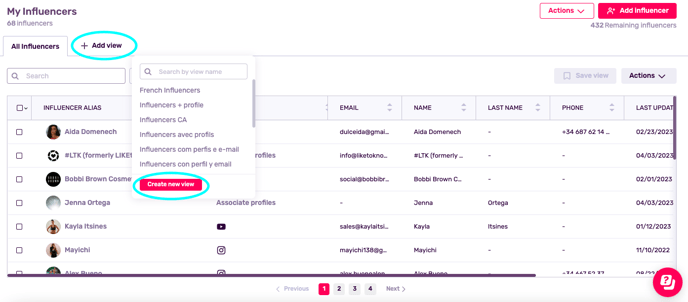
The My Influencers section has no pre-set views. To create your own, go to Add view and Create new view.
Note: Any views you previously created will also appear when you click Add view. For example, to include a tab for the view "French Influencers", just click on this view.
- Set a name to easily identify this view. In this case, Influencers w/profile & email.
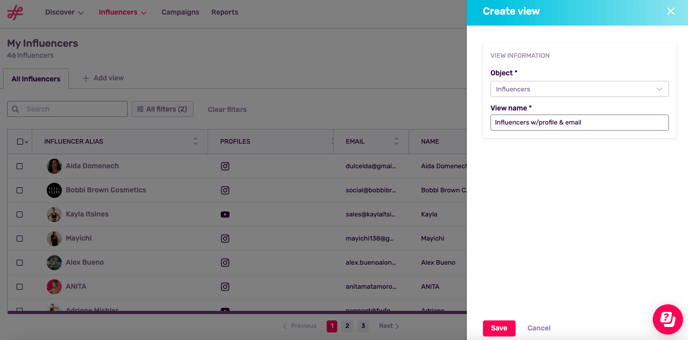
- Click on All Filters to filter influencers by their alias, associated profiles, email, name, last name, or phone number.
- Once you have your filters set, select Save view and Save.
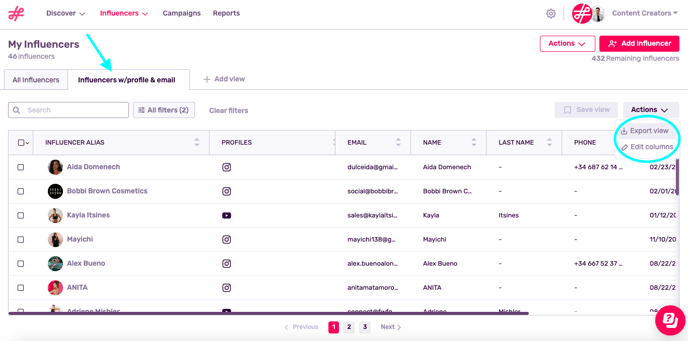
- This new view will then be displayed as a tab along the top of your table. Share this view by clicking Actions and Export view. Edit the columns that appear in the table by clicking Edit columns.
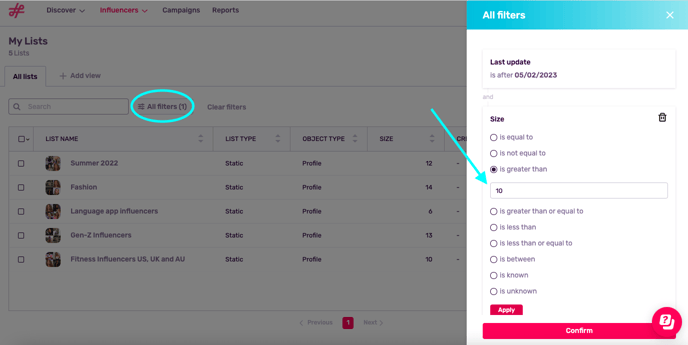
Creating Views for Lists
Create a View to have easy access to a select group of lists. To do so, click Add view or All filters and select filters in the sidebar window. In this case, we’re looking for our most updated lists, so we’ve selected the filter last update and set a date. We also want to work with exclusively large lists in this view, so we’ve selected Size, is greater than, and the number 10.
This way, when we select this view, we will only be shown our largest, most updated lists.
Like in the other sections, this View will now be displayed as a tab at the top of the table where it can be exported and its columns can be edited.