How to Set up Custom Bulk Email Domains
Learn how to personalize your bulk email domain
Note: This article focuses specifically on configuring custom email domains from your own email address. For an overview on how to configure general bulk emails, see here.
Customize an Email From Your Own Email Address
When you click Customize from address, you'll first be required to set up your email domain. Click this button to proceed.
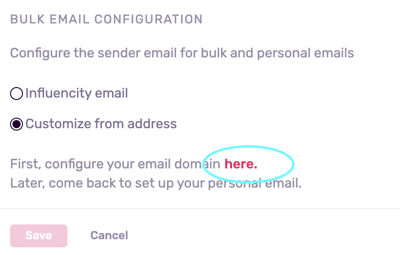
You'll first be asked to enter a business email address. Please note that addresses ending in @gmail.com cannot be accepted.
Click Save.

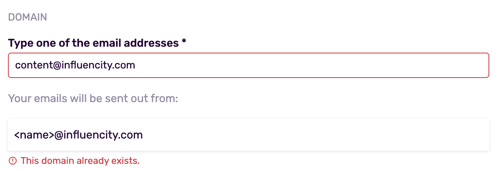
Warning: If you have registered your domain with Mailgun or one of your providers is using Mailgun to send bulk emails, you will get the notification below. To proceed, you would need to disconnect your email from this platform before using it with Influencity.
In the next window, you’ll be asked to log into your own domain provider (i.e. your gmail account) and locate your DNS record settings.
Note: DNS records are used for basic domain redirection. Domain redirection is a standard practice for any company that seeks to contact a large audience in a way that is both personalized and automatic. If you've ever sent newsletters or other mass emails from a CRM, the process is similar.
Once you’ve opened your DNS record settings, you’ll be required to copy and paste the hostnames and values below into your DNS records.
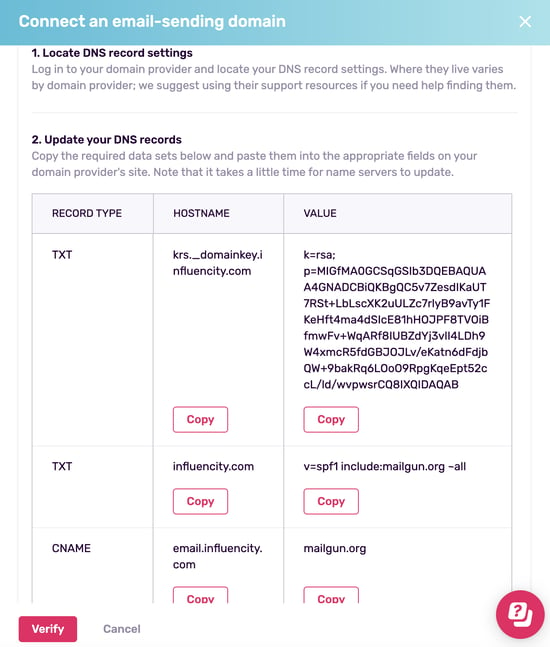
The way you do this will depend on the email server you have:
- AWS (Amazon): https://docs.aws.amazon.com/Route53/latest/DeveloperGuide/resource-record-sets-creating.html
- Google: https://support.google.com/domains/answer/3290350?hl=en
- Azure (Microsoft): https://learn.microsoft.com/en-us/azure/dns/dns-operations-recordsets-portal
- Cloudflare: https://developers.cloudflare.com/dns/manage-dns-records/how-to/create-dns-records/
- GoDaddy: https://www.godaddy.com/help/manage-dns-records-680
- Shopify: https://help.shopify.com/en/manual/domains/managing-domains/edit-dns-settings
- WIX: https://support.wix.com/en/article/managing-dns-records-in-your-wix-account
Once this information has been pasted into your DNS records, click Verify. It will take up to 48 hours to complete the verification process.
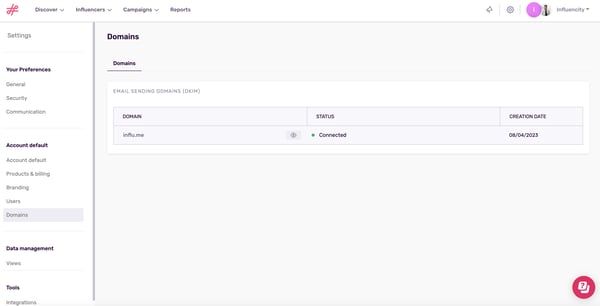
To check the status of your verification, go to Settings and Domains. When you've been verified your email will appear with a green dot and the status Connected.
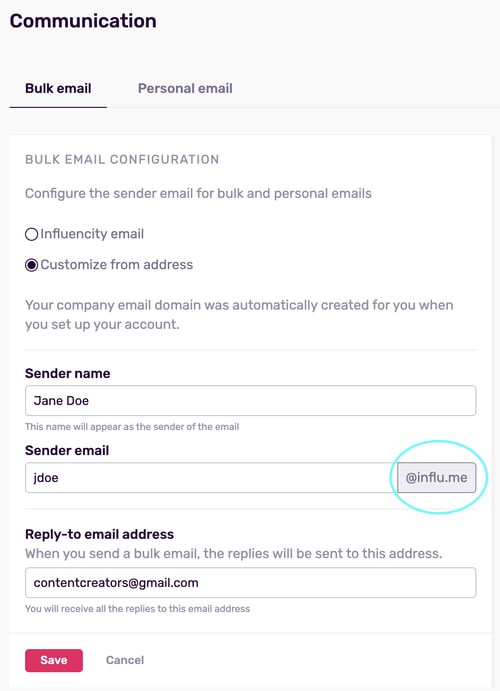
The last step is to return to the Communication tab and activate your new domain.
As you can see, the new domain will appear on the right. Fill in the sender email and reply-to address and click Save.
You're now ready to start contacting influencers. To learn how, click here.
Troubleshooting
The Platform Won't Accept My Email Address
This could be because of 2 reasons:
1. You are using an ordinary email ending in @gmail.com. Unfortunately, this feature is only available for use with business emails.
2. You have already registered your email domain with another provider. See above.