Note: This article describes how to add and synchronize influencers to a program. For an overview of programs and how to create one, click here.
There are two steps to working with influencers in programs: adding your influencers and synching your influencers. The second step is crucial, as it allows you to add your influencers as customers to your online store. By doing this, they’re able to use their influencer benefit code to select their free gift, following the same checkout process as any other buyer. Additionally, syncing your influencers allows you to track sales made using audience benefit codes. This way, you know which codes (and therefore which influencers) are bringing in the most sales.
For an overview of influencer and audience benefits, click here.
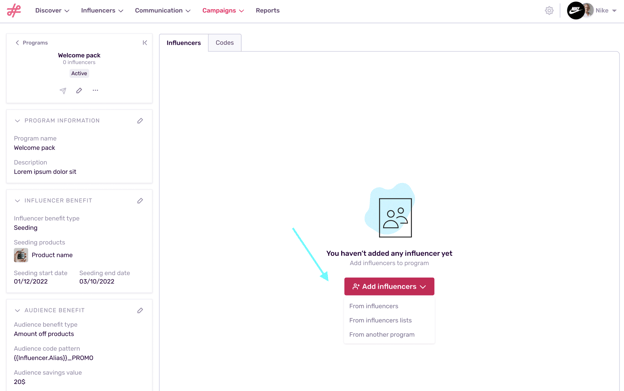
Step 1: Adding Influencers to Programs
The process of adding influencers to a program is quite similar to that of adding them to a list or campaign. There are 3 options:
- Add from Influencers
- Add from an Influencer list
- Add from a Program
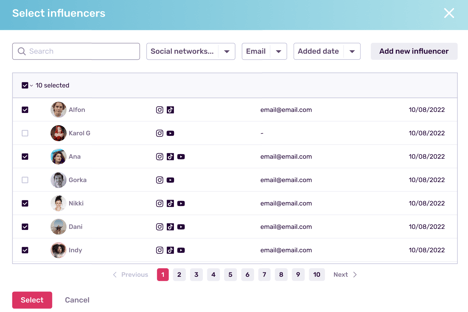
In all cases, you’ll get a pop-up window where you can tick the box next to the influencers, lists, or programs you want to work with.
To select all, tick the box on the top left. Only influencers with an email address can be added to a program.
Use the search bar and filters to search for specific influencers, lists, or programs.
If you want to work with an influencer who is not yet part of your database, click Add new influencer. Any new influencers will need a valid email address.
Step 2: Synching Influencers to Programs
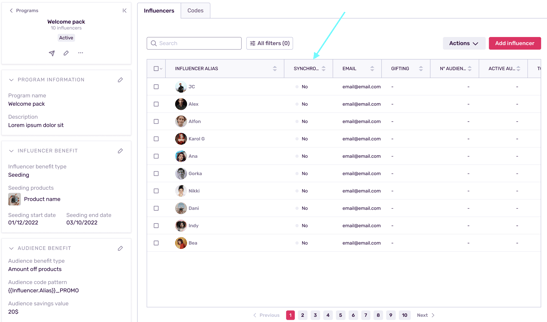
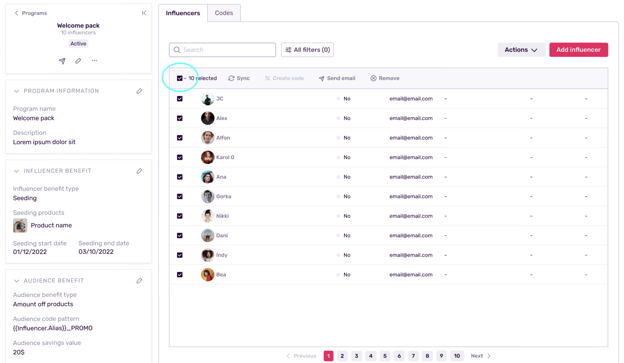
- The influencers you just added will now appear in the table below. At the moment, none have been synchronized.
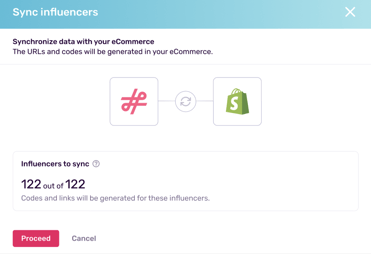
Note: Syncing influencers involves automatically generating audience benefit codes in your e-commerce store and adding influencers as customers. This allows you to track sales made with audience codes and lets the influencers in your seeding utilize their influencer benefit code to claim their free gift.
- Tick the box at the top left to select all the influencers. Alternatively, select them one by one.
- Click Sync, in the menu bar.
- You’ll get a notification asking you to confirm the synchronization with your Shopify account. This is what allows you to see the status of your codes, the number used, and total sales, directly from the Influencity platform.
- Click Proceed.
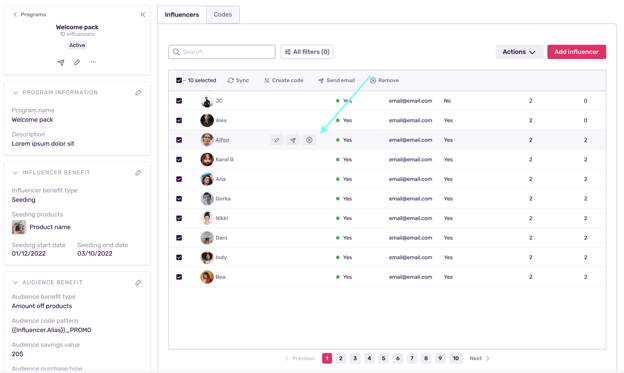
- Take a look at the Synchronized column. Your influencers will now be marked by a green dot.
- Hover over an influencer’s row to edit their information, send them a message, or delete them from the program.
- Click on the influencer’s name to open the influencer management window. The information is divided into 2 sections:
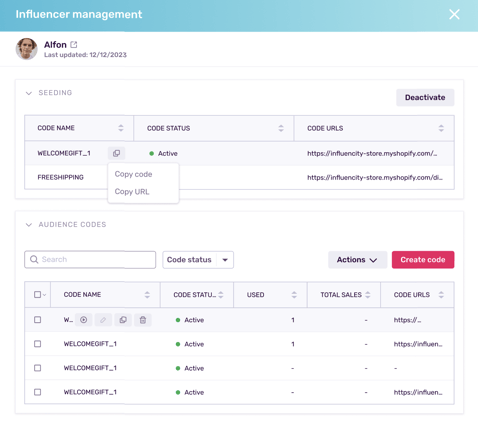
→ Seeding information: Here there are 2 sets of codes and URLs: one link and code to get the free gift and another link and code to get free shipping. Click Deactivate if you want to disable these codes.
→ Audience codes: these are the discount codes that influencers would share with their followers to make sales. Here you can see which codes are activated, how many of each have been used, the total sales attributed to the influencer, and the URL where the codes can be redeemed.