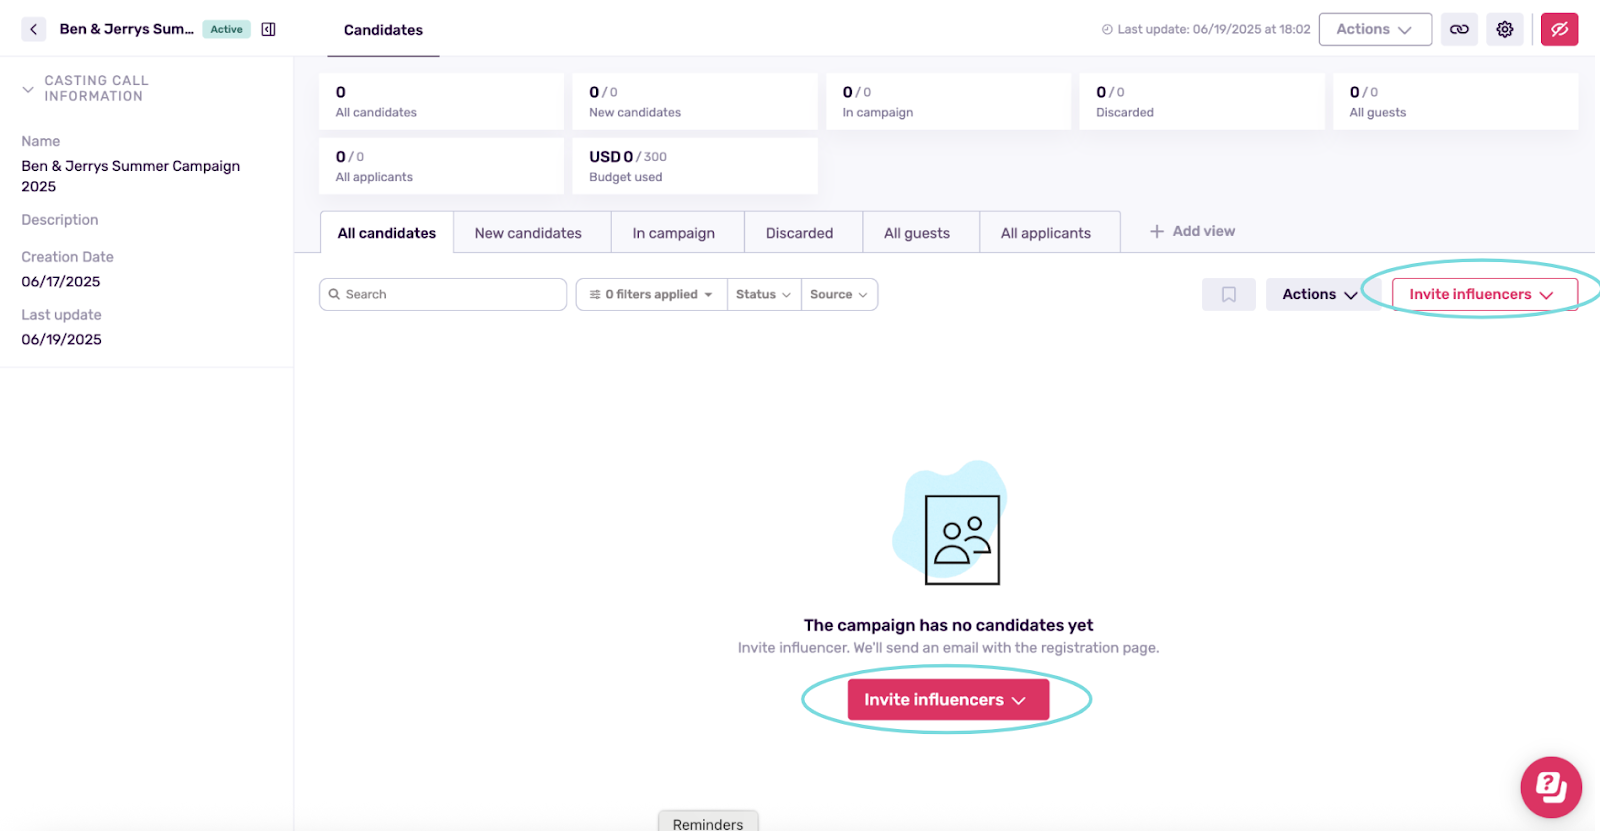
Once your casting call is live and influencers begin applying or are invited, the next step is managing those applications and selecting the right creators for your campaign. Here’s how to navigate your dashboard and make informed decisions.
Inviting Influencers
You can invite influencers directly to your casting call from within the Influencity platform.
To do this:
- Go to your Casting Call Dashboard.
- Click on “Invite Influencers”. As you can see, you have two buttons to invite.
- Once you click on the button, a dropdown menu will display the different sources you have to invite influencers. Select profiles from your influencer database or add new contacts manually.
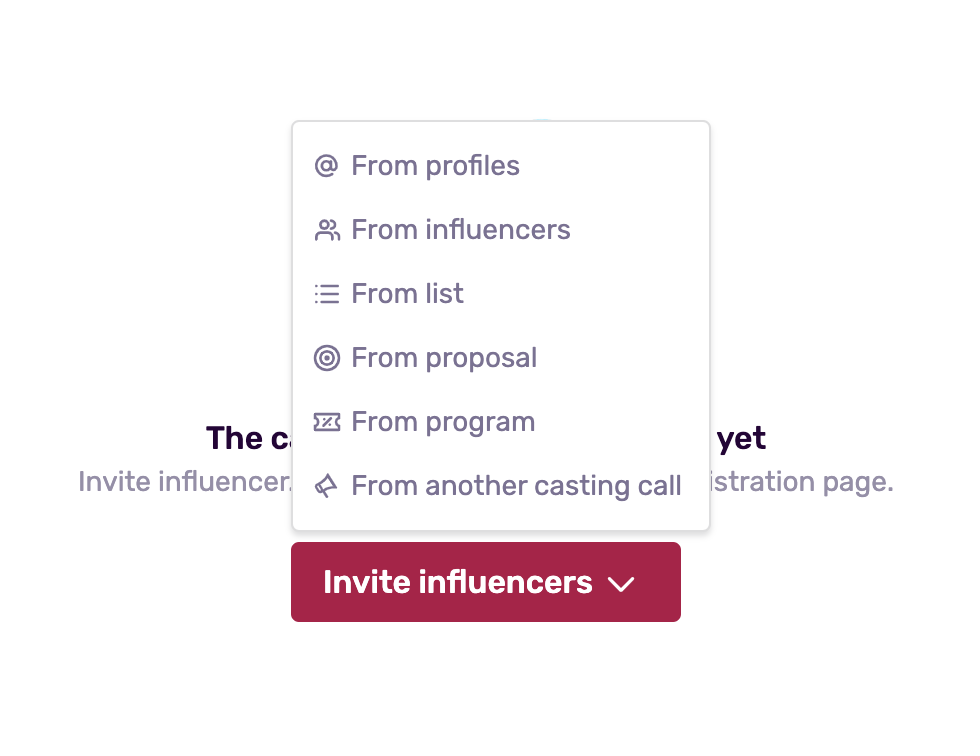
Note: Like with any other tool in Influencity, you have several options to choose from. You can invite influencers from your IRM, whether it’s from Profiles, Influencers, Lists, Proposals, Programs, or even other Casting Calls. They’ll automatically receive an email with the campaign URL as soon as they’re added to the Casting Call, so they can apply directly.
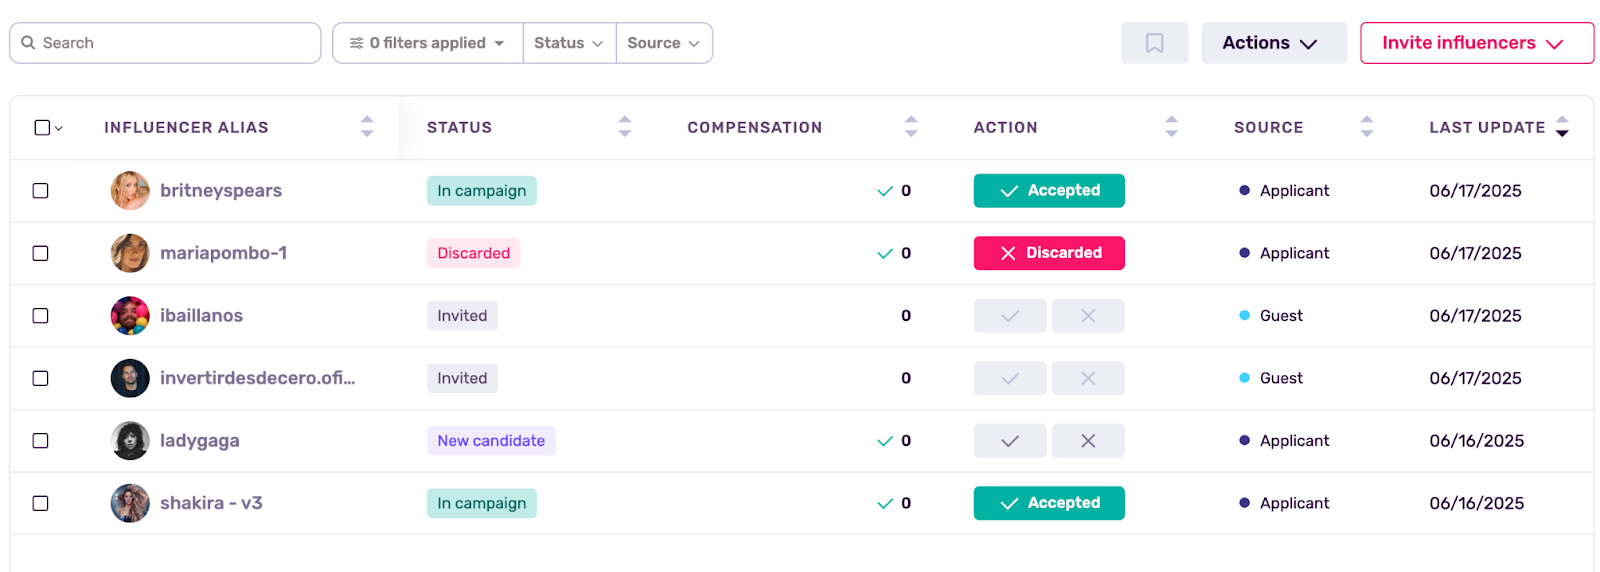
4. Once invited, they will appear in the dashboard under the "Invited" status until their candidacy is accepted or rejected.

Reminder: Even if you invite an influencer from your IRM, they will appear in the applicant list regardless of whether they meet the campaign requirements. Only influencers who apply on their own are filtered by minimum follower and engagement criteria.
On the other hand, influencers who discover your casting call via a public link or landing page and choose to apply on their own will appear here as “applicants.”
This distinction helps you easily identify:
- Who you handpicked (Guests)
- Who showed organic interest in your campaign (Applicants)
Important: Both groups need to be reviewed and either accepted or rejected before they can participate
.
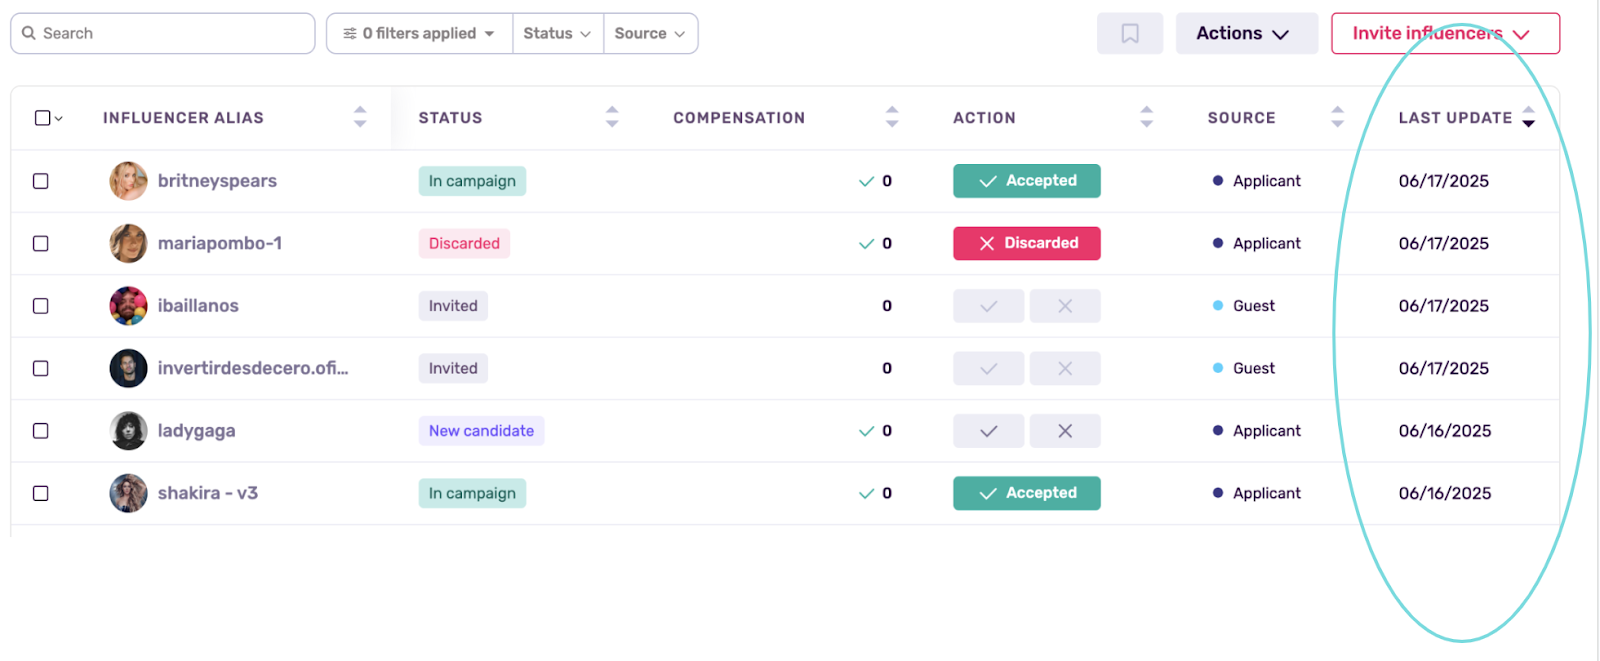
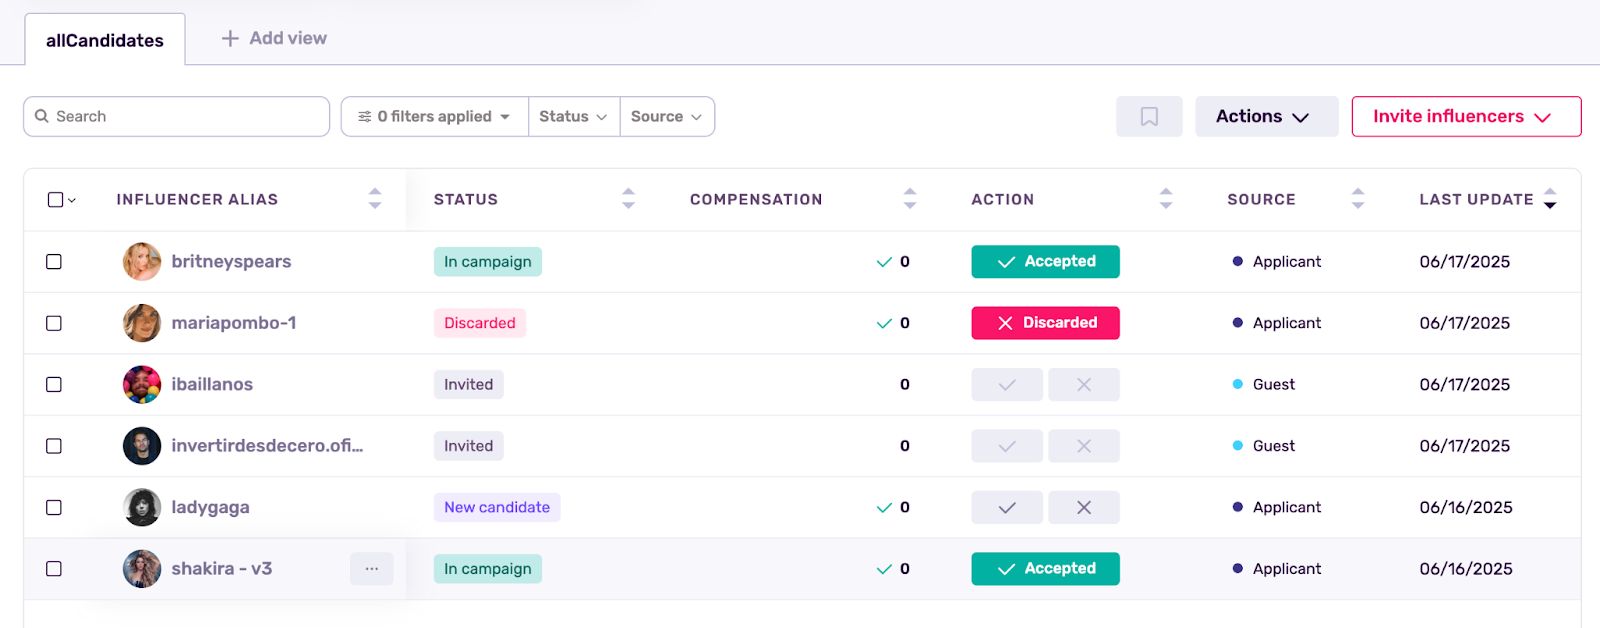
How Influencers Appear in the Dashboard
As influencers interact with your casting call, they’ll be categorized into different statuses:
Understanding Status vs. Source in the Casting-Call Dashboard
When you open your Casting-Call Dashboard you’ll see two key columns that tell you where each creator came from and what stage they’re in:
|
Column |
What it tells you |
|
Status |
The creator’s current stage in your workflow (e.g., waiting for review, accepted, or rejected). |
|
Source |
How the creator entered the casting call—whether you invited them (Guest) or they applied on their own via the public link (Applicant). |
Status Definitions
|
Status |
What it means |
Typical next step |
|
New Candidate |
A creator who meets all minimum requirements and applied through the public link. They have not been reviewed yet. |
Accept or reject after evaluation. |
|
Invited |
A creator you hand-picked and sent an invitation to. They haven’t been accepted or rejected yet but they have filled in the form. In the Source column, they appear as Guest. |
Await your decision—accept or reject. |
|
In Campaign |
Creators you have accepted. They are now official participants in the campaign. |
Manage deliverables and payouts. |
|
Discarded |
Creators you rejected. Emails are sent automatically, and this action cannot be undone. |
No further action (kept for record-keeping). |
As you can see, at the top area of your Casting Call Dashboard, you’ll find a quick overview of your campaign's progress. This section summarizes how many influencers fall into each category, helping you keep track of your pipeline at a glance.

- All Candidates: Total number of influencers currently under consideration.
- New Candidates: Those who have applied and meet requirements but haven’t been reviewed yet.
- In Campaign: Accepted influencers officially part of your campaign.
- Discarded: Applicants you’ve rejected.
- All Guests: Total number of influencers you personally invited.
- All Applicants: Everyone who submitted an application through your casting call.
- Budget Used: How much of your total allocated campaign budget has been used so far.
Note: The Budget Used tab will automatically update as you accept influencers into your campaign. It reflects the total value committed to creators onboard, helping you stay on top of your spending without manual tracking.
Accepting or Rejecting Influencers
After reviewing each influencer’s profile and responses, you can choose to accept or reject them.
You can:
- Take action individually by clicking on an influencer’s profile and selecting Accept or Reject.
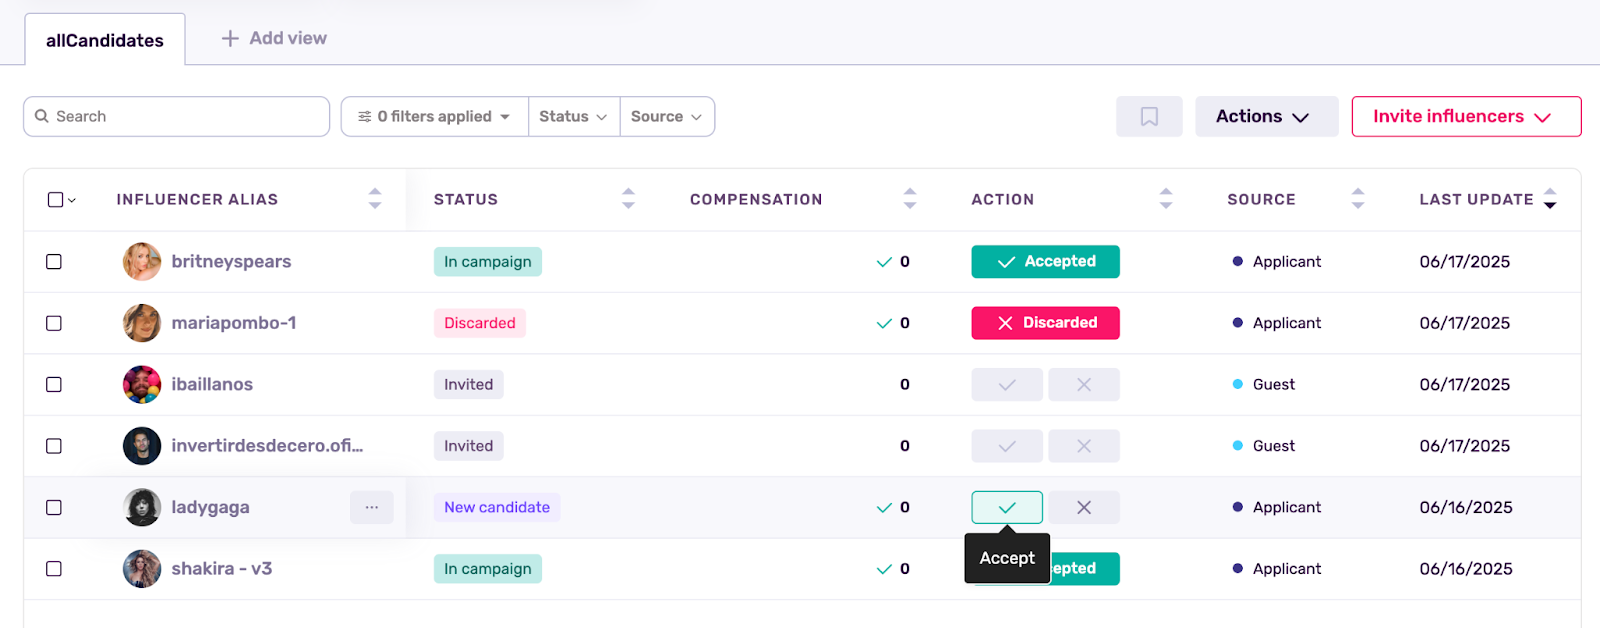
- Take bulk actions by selecting multiple profiles at once and choosing the appropriate action.
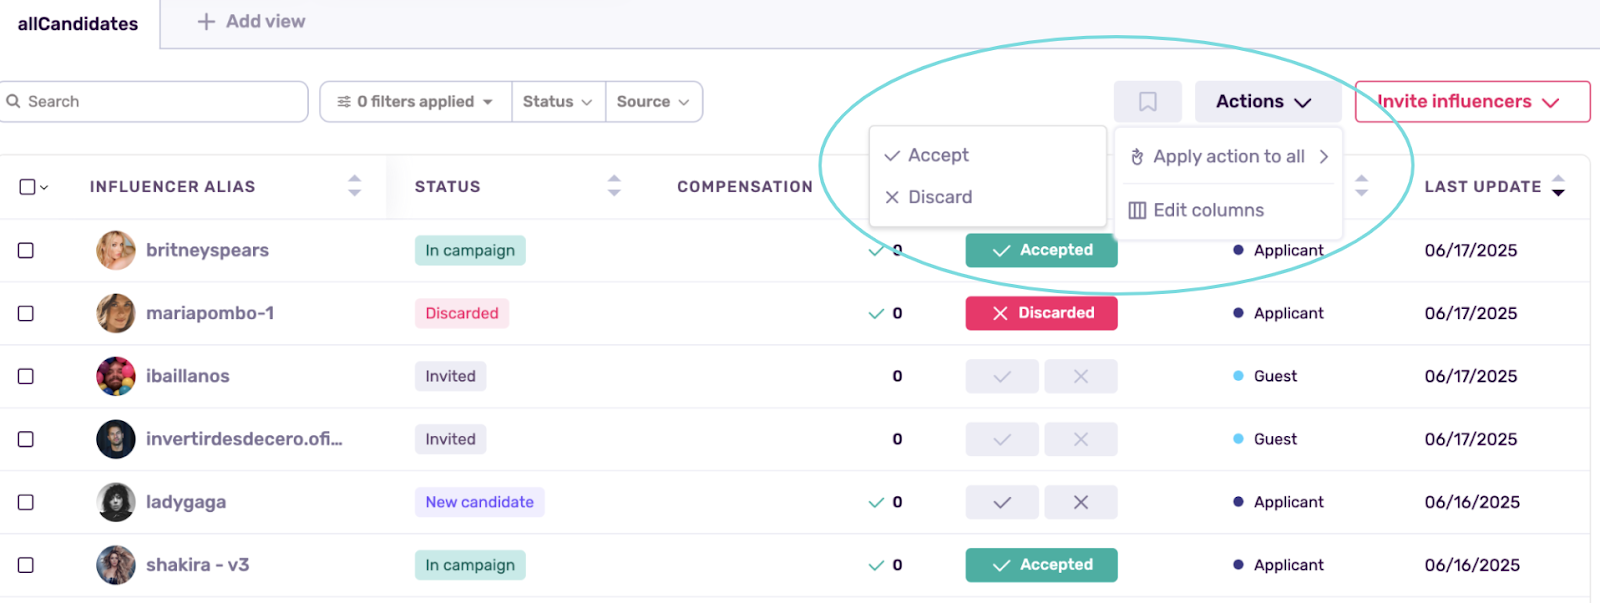
Important: Once you accept or reject an influencer, this action cannot be undone. That’s because email automations are triggered immediately to notify influencers of your decision.
Other Tools & Features
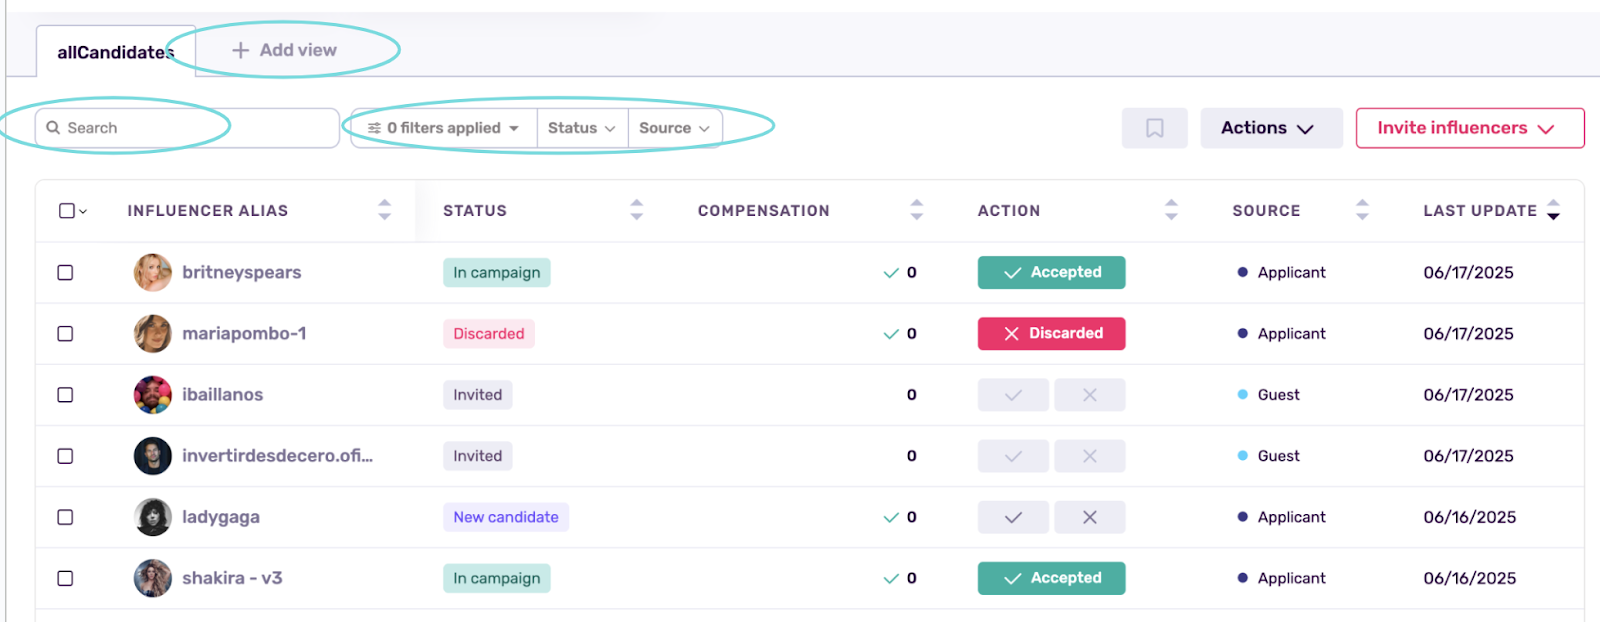
- Add View: Customize how you view candidate data (e.g., by filters or tags).
- Search Bar: Quickly locate specific profiles or filter by status.
- Filters: (e.g., by status or source) – currently showing 0 filters applied.
Real-Time Updates
On the right side of the dashboard, you’ll see the Last Update timestamp (e.g., 06/19/2025), so you always know when the latest activity occurred.