Discover how to efficiently plan and schedule your content using Influencity.
How to Schedule and Publish Content
Influencity offers three convenient ways to schedule your content:
- From the Calendar: Manually schedule your posts by selecting the date and time directly on the calendar. Learn How to Schedule Content from the Calendar in Influencity here.
- Autolists: Set up recurring content by creating automatic lists to schedule repeated posts. Learn How to Schedule Content from an Autolist with Influencity here.
- From CSV: Use batch scheduling by importing your posts through a CSV file for efficient bulk uploads. Learn How to Schedule Content from a CSV File in Influencity here.
Additionally, you can quickly reschedule content from the analytics section. Simply click on the content you want to reuse, and the planner will open automatically. You can even switch between brands for cross-channel management.
Tip: Make sure to check the guidelines and limitations for each social network to ensure your posts are scheduled correctly.
Posting by Social Network
Need help with posting on different social platforms? We’ve got you covered with detailed guides for each:
- Instagram here.
- TikTok here.
- Threads here.
- Pinterest here.
- Google Business Profile here.
- LinkedIn Carousel Posts here.
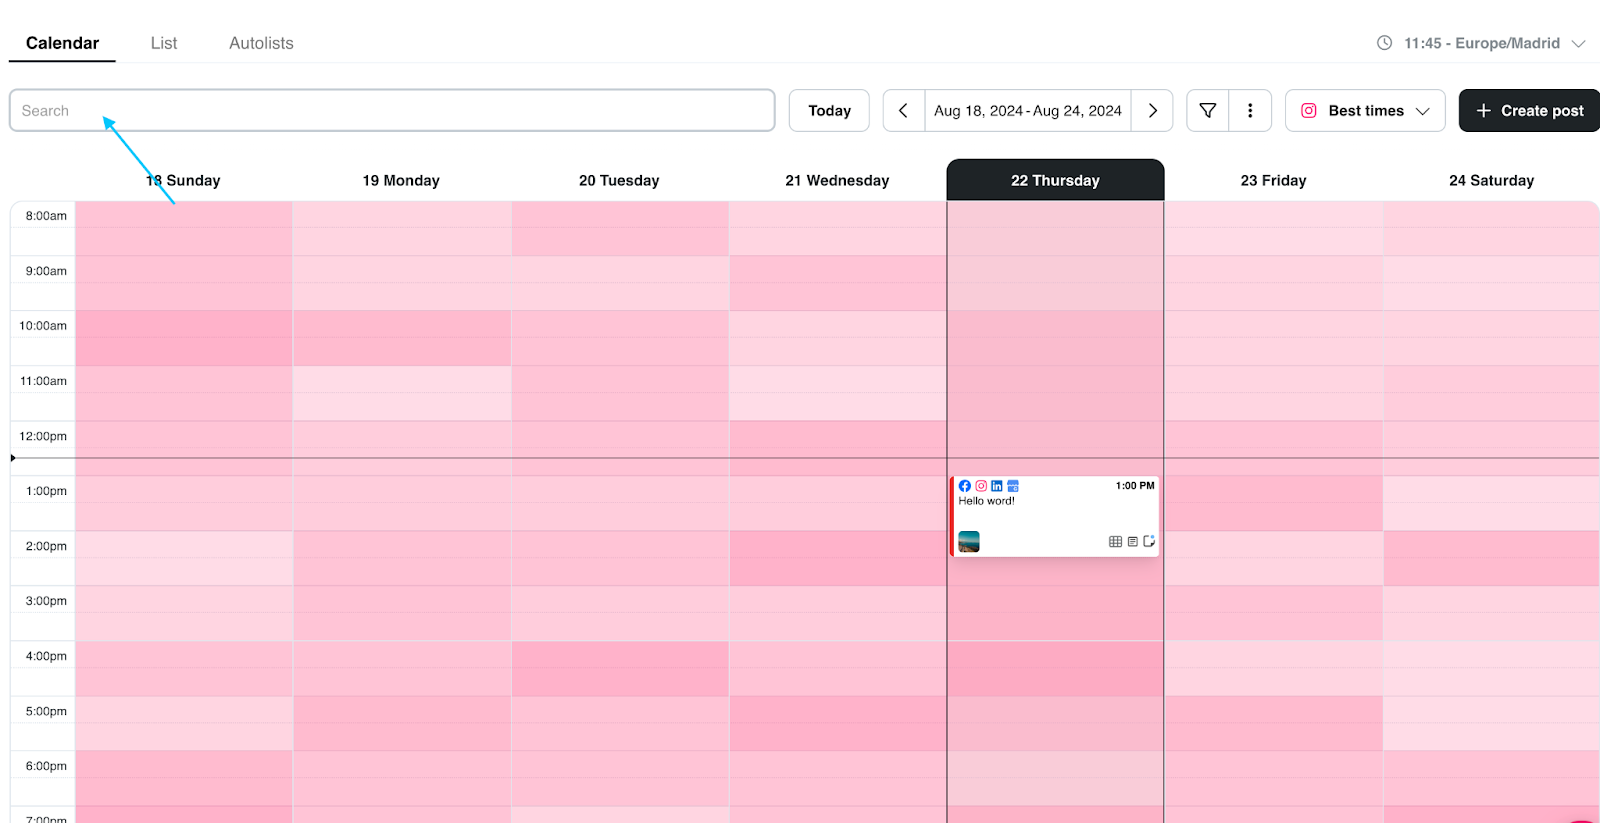
Best Times to Post
Influencity’s Best Times to Post feature helps you schedule content for maximum engagement. Available for Facebook, Instagram, TikTok (Business Accounts), X (Twitter), LinkedIn, and YouTube.
How to Find the Best Times to Post?
- Go to planning: After connecting your social networks in the Planner, click on the "Best times" button at the top right of the screen.

- Choose Your Platform: Select the platform you want to analyze. You'll see a grid with different color shades. The darker the shade, the better the time to post.
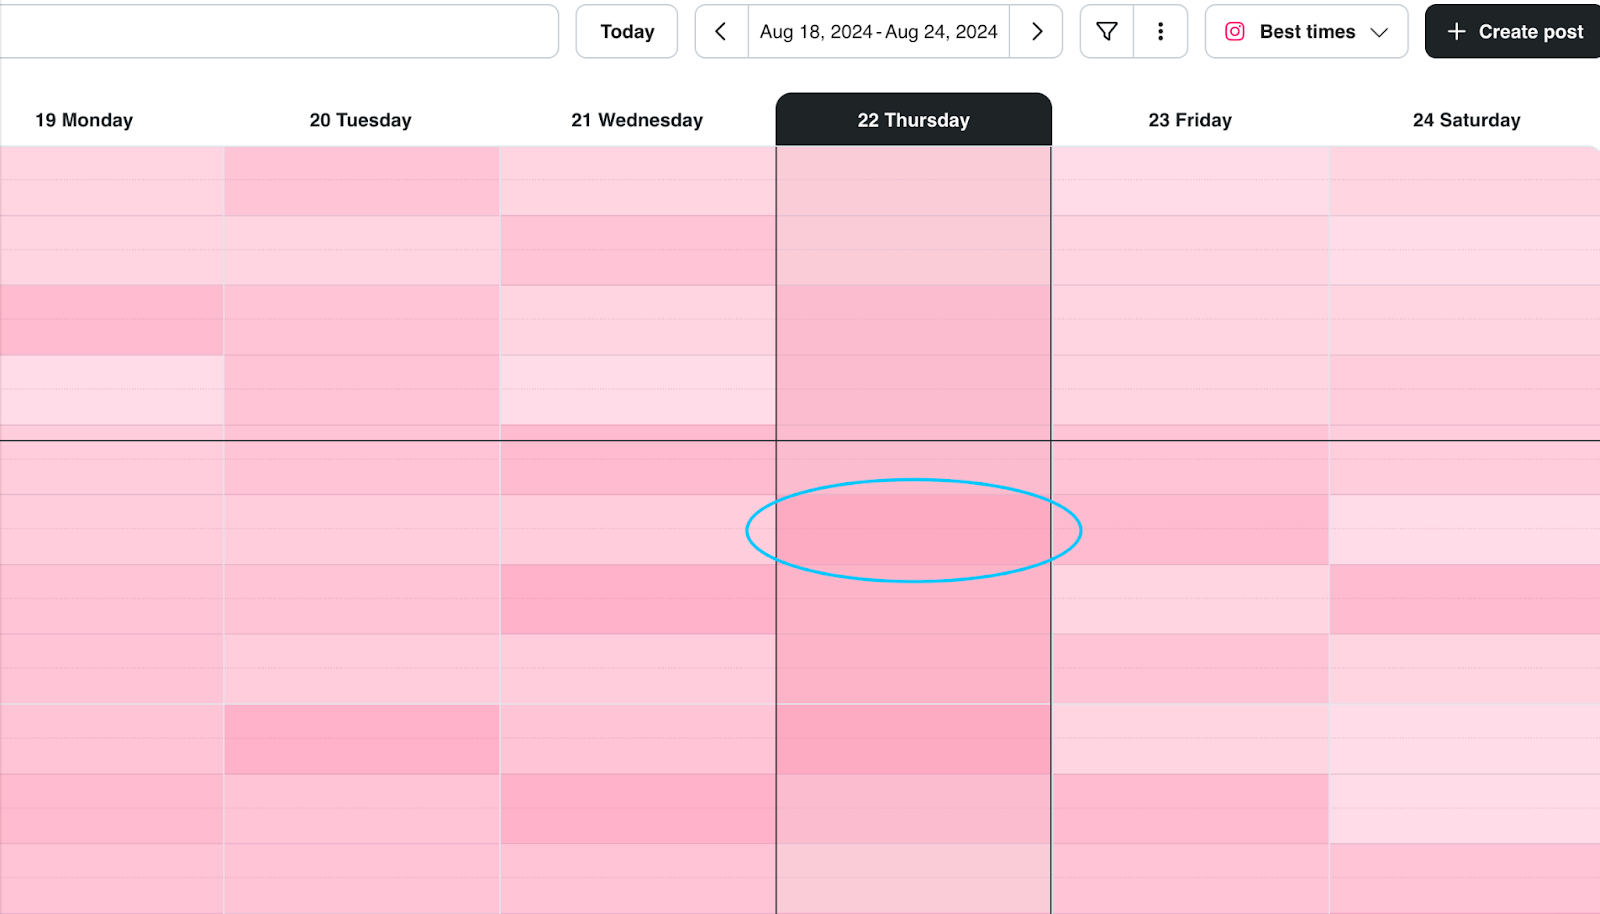
Note: Keep in mind that for Facebook, Instagram, and TikTok, the data is provided directly by the platforms. You need at least 100 followers to display this information.
How Is the Data Calculated?
- Facebook, Instagram, and TikTok: These platforms provide us with data based on when your audience is most active. You need at least 100 followers to access this information.
- X (Twitter): Influencity calculates the best times to post based on your followers' activity over the previous week. You need at least 300 active followers for this feature. Keep in mind, the calculation is based on active followers for a specific time slot, not the total number of followers.
- LinkedIn and YouTube: Our platform uses behavioral studies to determine the best global posting times, although this data is not specific to your account.
Content Approval System
The content approval feature lets you approve or reject posts based on assigned roles. Users without an Influencity account can be included in the approval process by adding their email.
Common Roles
- Client: View-only role that can approve or reject posts.
- Content Creator: Editor responsible for scheduling posts through the approval system.
Approval Process Flow
Event Tracking: Post events such as creation, rejection, and rejection messages will be displayed in the notes section. If the post is edited, it must be sent for approval again.
Steps to Submit a Post for Review
- Create the post in the planning section and click "Submit for Review."
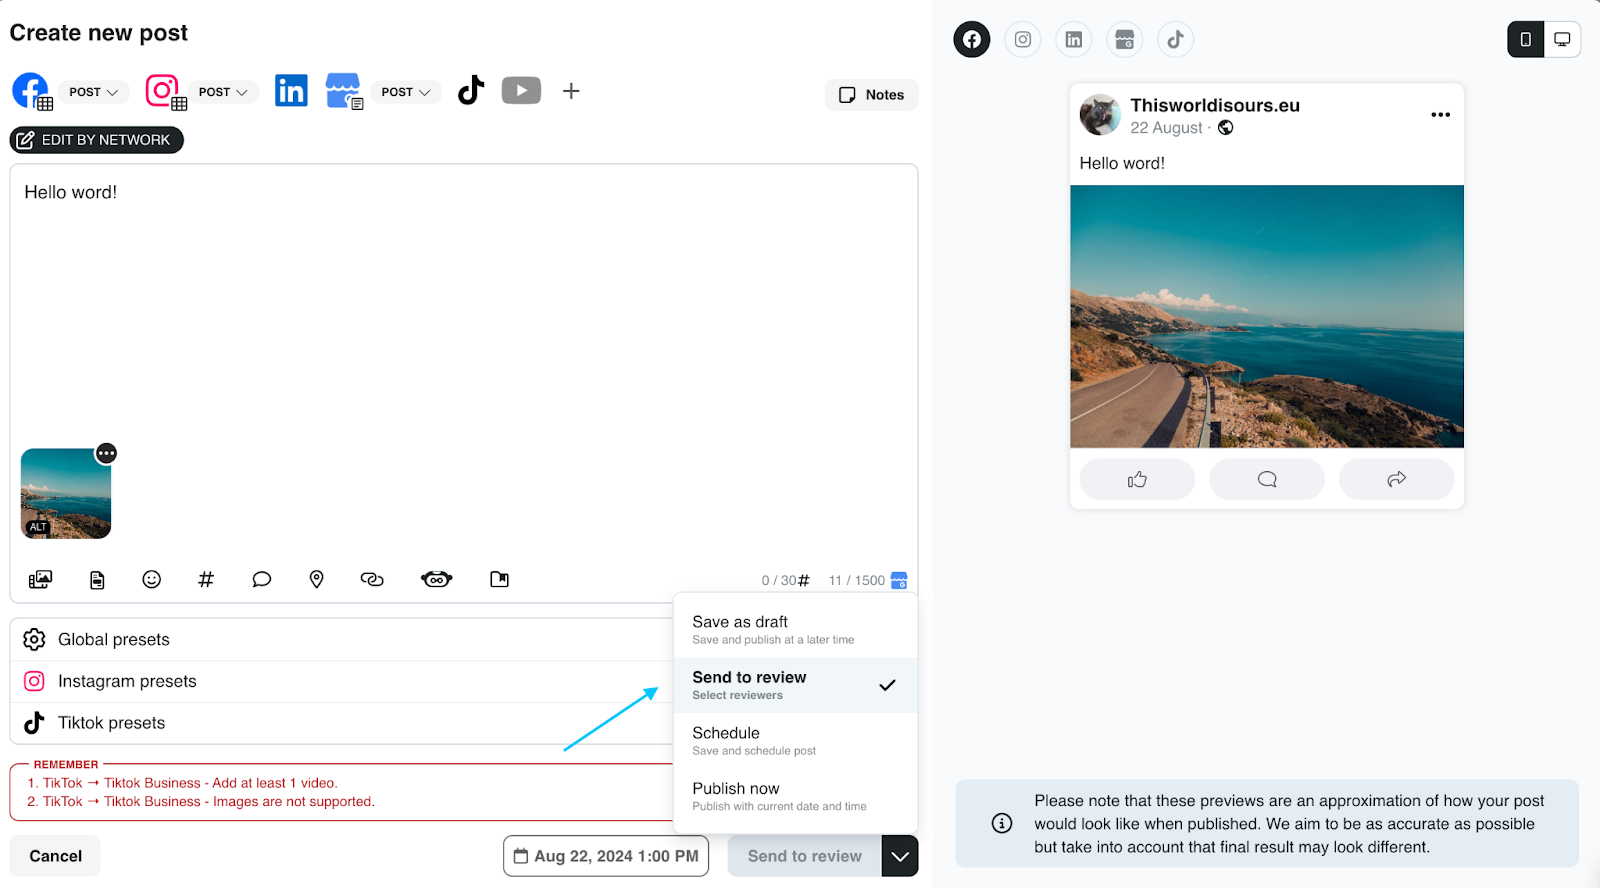
- Select the reviewers and click "Send." You can enable or disable the "Send notification by email" option.
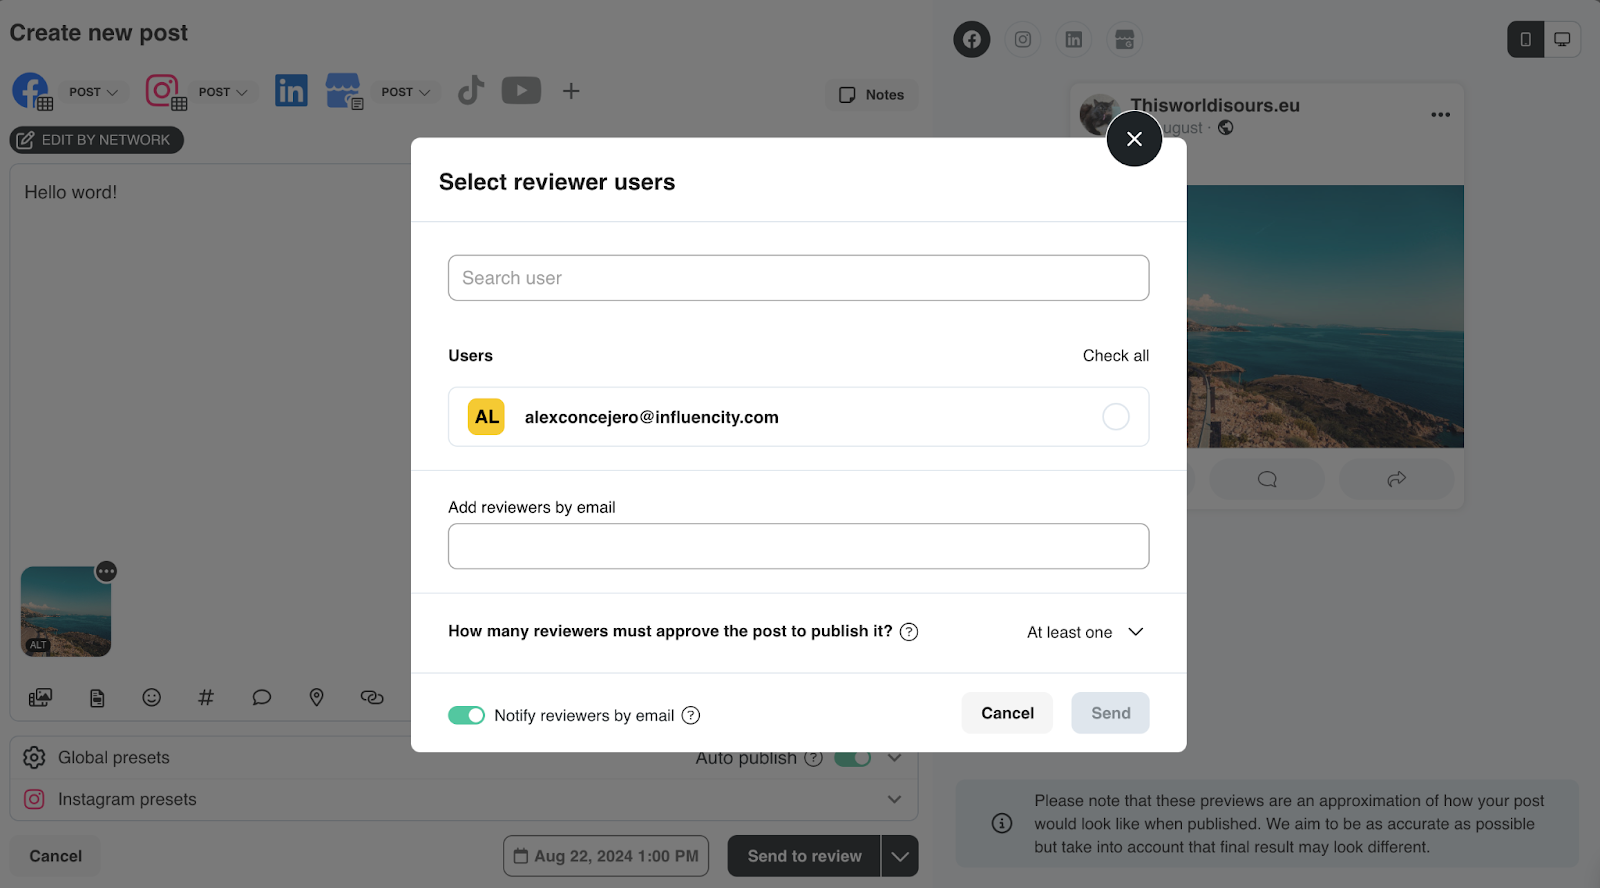
Tip: You can add Influencity users or manually enter the email of non-users.
Approval Criteria
- No Reviewers: All reviewers are notified, but if no one rejects the post, it will be published.
- At Least One Reviewer: At least one reviewer must approve the post; otherwise, it won’t be published.
- All Reviewers: All assigned reviewers must approve the post for it to be published. If anyone rejects it, the post will not be published.
Post Status Indicators
- Pending Approval (Yellow): The post is awaiting review.
- Approved (Green): The post is approved and will be published on the scheduled date.
- Rejected (Red): The post is rejected and will not be published. Optionally, a rejection note can be left.
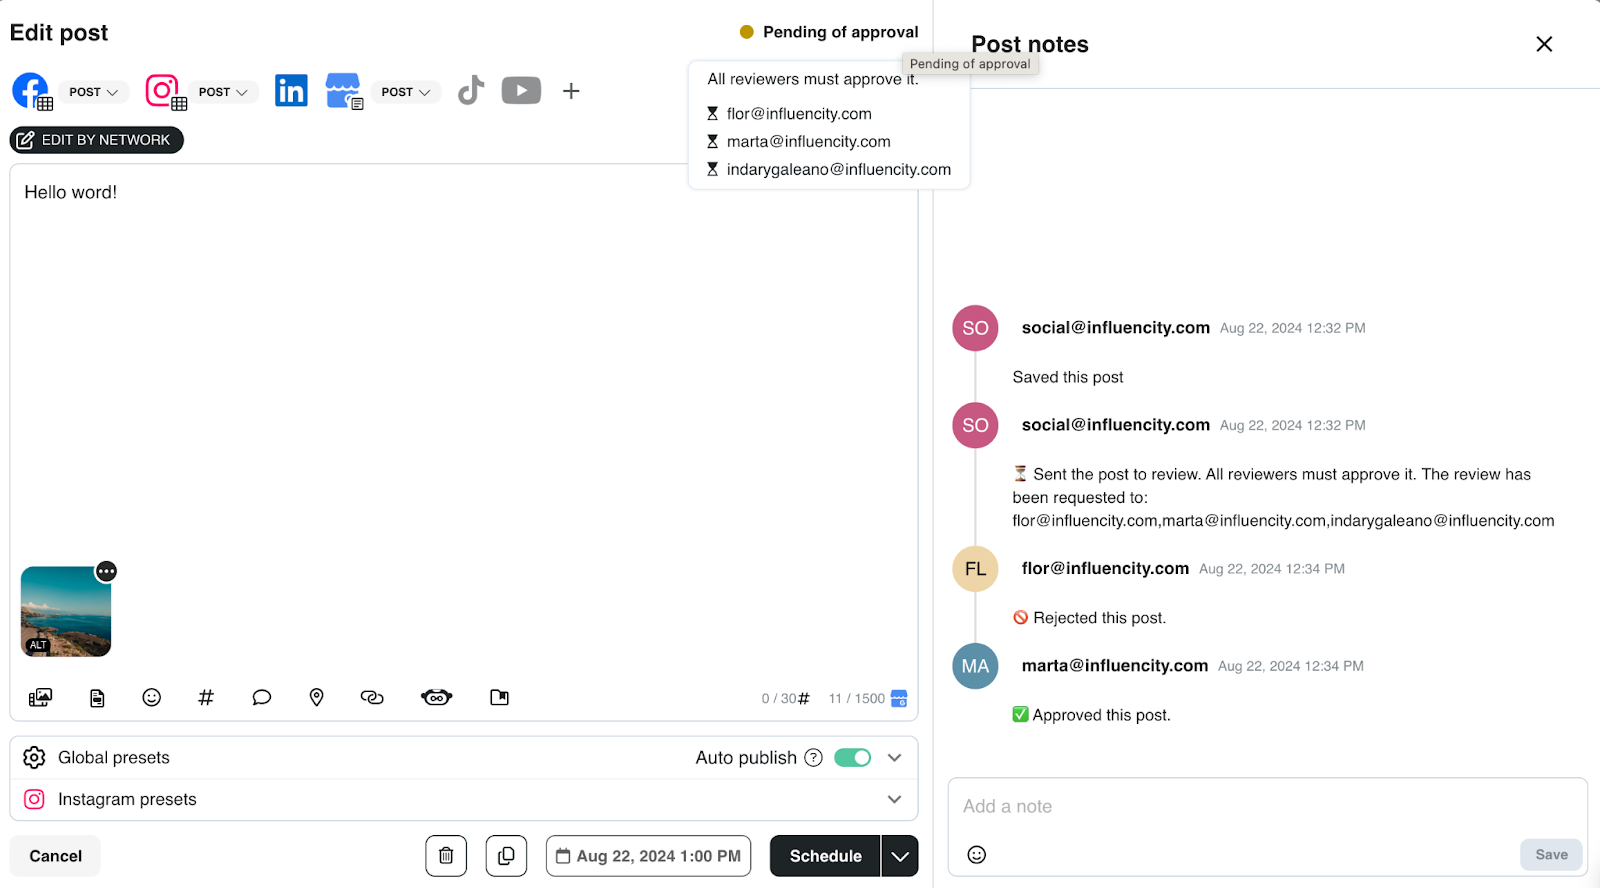
If more than one user needs to approve the post, it remains in the pending state until all required users approve it. The approval status for each user can be tracked.
Tip: You can manage content approval in bulk by going to Planning > List > Bulk Actions. This feature allows you to approve, reject, send for review, or delete pending posts from the calendar (already published posts must be deleted from the social network itself)
Filtering and Searching for Publications
From the Calendar or List View, filter your content by:
- Social Network
- Post Status
- Notes
You can also use the search bar to locate specific posts easily.
Optimize Your Planning
Influencity provides powerful tools to help you streamline your content planning process. Explore the following features:
- Image and Video Editing from the scheduler
- AI Text Generator for crafting content
- Notes to enhance your planning
- Text-Saving Feature for repeated use
- UTM Builder to track your content performance