A Guide to Your Campaigns Home
Find out more about the Influencity Campaigns product here.
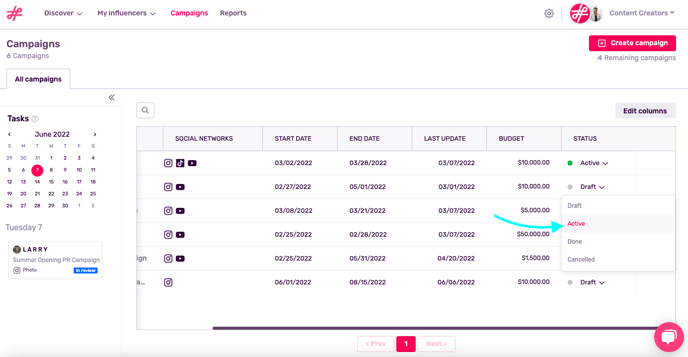
The main overview page includes a calendar that displays pending tasks, a list of all campaigns, and the option to create a campaign.
Edit the status of your campaigns from this very page, by going to the Status column and selecting an option from the drop-down menu, or open a campaign to see all of its data.

Campaign Page
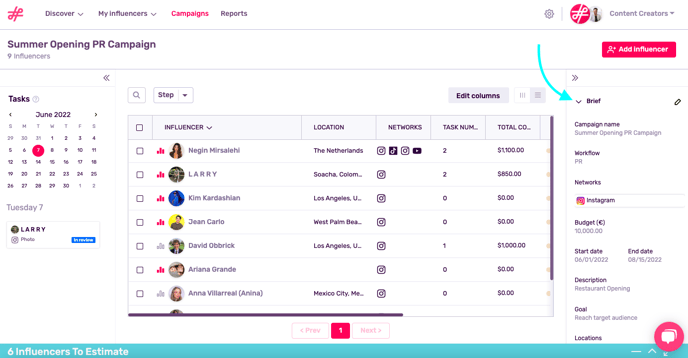
The actual campaign page offers various options. On the left, we have a calendar specific to the events of this campaign. On this particular day, one influencer profile is in review.
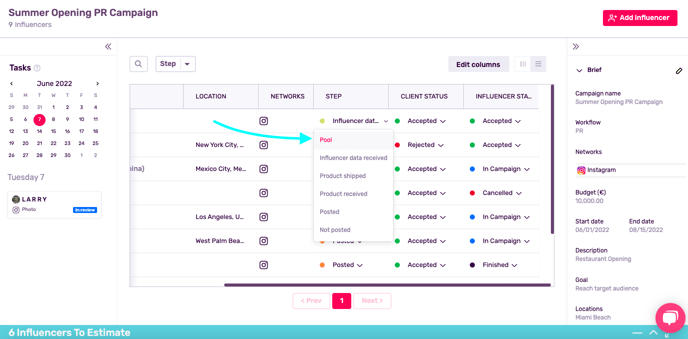
In the center, you’ll see all the profiles included in this campaign. As they progress through your campaign, you can update their status as a mass action or one-by-one, by going to the column Step and selecting an option.
Note: A profile must be associated with an influencer in order to be included in a campaign. Learn how to do so here.
Initially, all profiles will have their status set to Pool, meaning they’ve been included in a campaign but their full participation is pending price negotiation and client approval. Once an action is completed, for example, their data and signed contract have been received, this profile can be moved to the next step.

Finally, on the right, you can edit your Campaign Briefing or add more influencer profiles. For example, if you’ve expanded your budget or redefined your dates, you can save these changes here and all brand users will see this updated information.

Keep learning about the Influencity Campaigns product by checking out our FAQs.