An IRM allows you to create and maintain relationships with the influencers in your campaigns. In this article, you’ll learn how to use these 4 sections of the IRM tool.
Overview
This is the main dashboard of the IRM product. Here you can see the number of profiles, influencers, and lists saved to your IRM, as well as a breakdown by social media network. You also have the option to Create a list, Add an influencer, and Add a profile.
Scroll down further for easy access to the last profiles, influencers, and lists created. To navigate around the IRM, select an option from the drop-down menu.
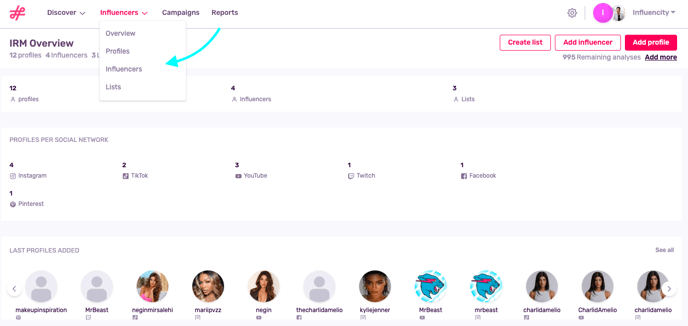
Note: While you can save profiles from Twitter, Pinterest, Tumblr, Snapchat, and more, you can only analyze social media profiles from Instagram, TikTok, Twitch and YouTube.
Profiles
This is where you can find all your saved profiles – that is, the social media accounts that you’ve saved from Discover. This page gives you various options. Let’s start from the top:
Add Profile
Add a social media profile by pasting the account URL or handle. Analyze a profile's complete metrics or just save it as a contact. Learn how to do so here.
All Profiles
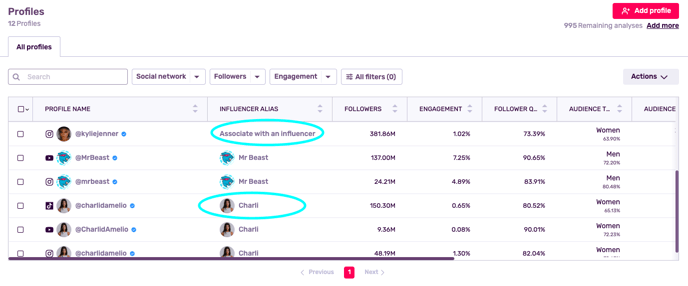
This table includes all the profiles you’ve added to the IRM as well as their KPIs such as number of followers, engagement, and follower quality. Along the top, you have the option to sort profiles by social network, followers, and a number of other metrics. You can also search a profile by its handle.
Choose the columns you want to appear in this table by going to Actions and selecting Edit columns.
In our example below, the TikTok profile @charlidamelio has been associated with Charli the influencer, the person who owns the account. The Instagram profile @kyliejenner has not been associated with an influencer yet, so you’re given the option Associate with an influencer.
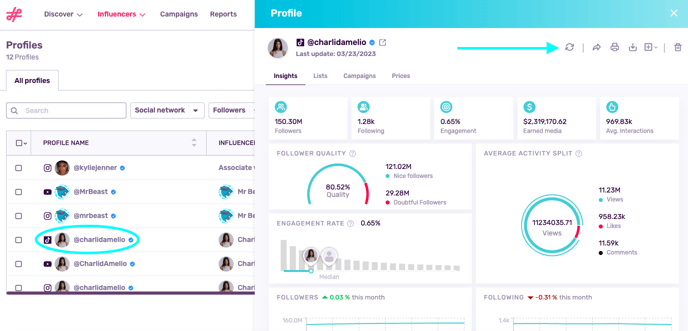
Profile Metrics
To see @charlidamelio’s TikTok metrics, click on her handle.
At the top of this window you have the option to refresh this data, share it via a URL link, export it to PDF or Excel, or add it to an influencer or a list.
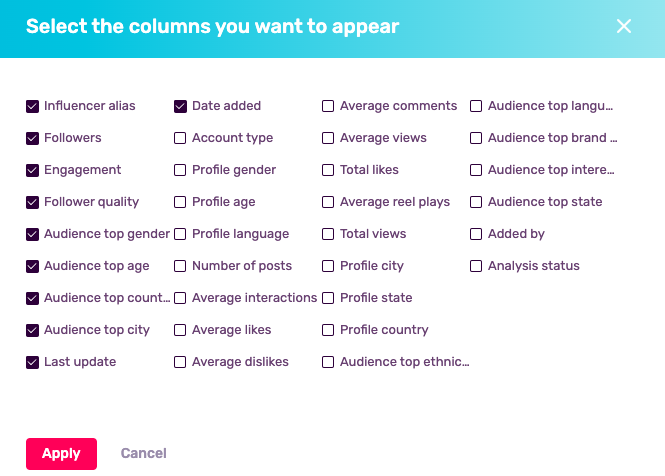
Customize Your Data
Change the columns that appear in the All profiles table by clicking Actions, on the right.
Choose from a wide range of data to include in your columns. This is great if you want access to key stats, fast.
Influencers
The term influencer refers to the actual person who runs the account. This is the person you would contact by phone or email to propose a collaboration and the person you would maintain a professional relationship with during the course of your campaign.
Like the section above, this page offers options for saving and organizing your influencers. Again, let’s start from the top:
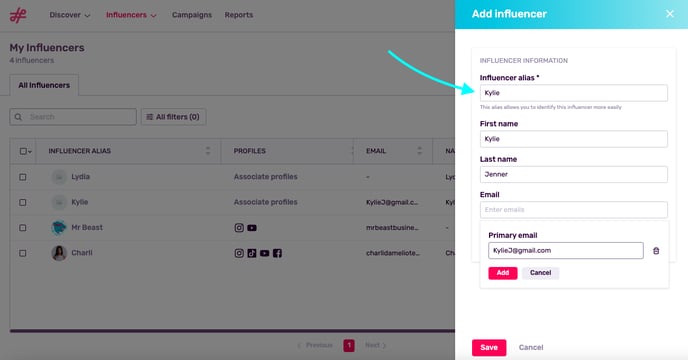
Add Influencer - Click this button to open this side window. Add an alias to easily identify this influencer and include a full name or any contact information they may have shared with you.
All Influencers - Search an influencer by their name or alias or apply filters to find influencers that match specific criteria.
In the table, you can see what profiles have been associated with an influencer, as well as their contact information, the date they were added, and the team member who added them.
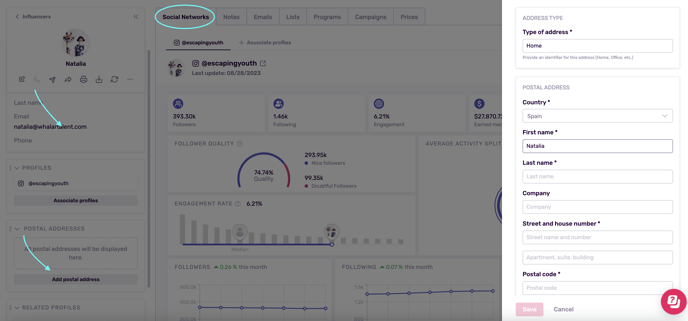
Influencer Pages - Click on an influencer's alias to see their full page. This is your one-stop-shop for all of their relevant information. Along the top, see any associated profiles, as well as any notes, email exchanges, or prices that you've saved. On the left, you can see their public email address and phone number, and have the option to add a postal address to keep it on hand in case you ever need to send them a gift or product sample.
Lists
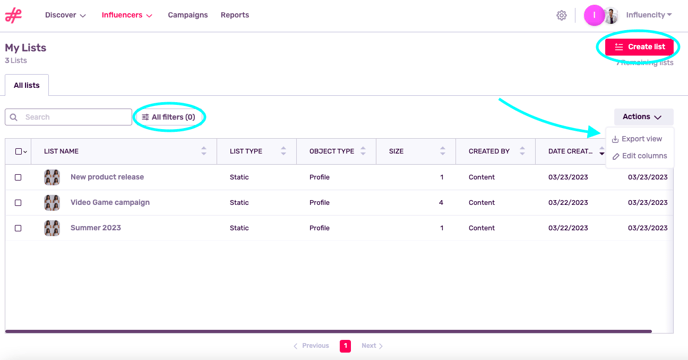
Create lists to organize your profiles and influencers. In the main table, search existing lists by name, filter lists by type, size, or creator, and edit the columns that appear.
To get started with your first list, click here.
The Next Steps
Now that you know the difference between each section and what you’ll find in each one, let’s look at the next steps.
- Make the most of the IRM by associating profiles with influencers. This puts all your relevant collaboration details in one easy-to-use place.
- Learn about the 20+ metrics that Influencity provides for profiles on Instagram, Twitch, TikTok, Twitch and YouTube.